Monday, January 31, 2011

Assembling the Blocks

.
Time to put the blocks together! Aren't you excited?
This step is where mistake #2 comes in. I'll show you later :)

Take two of your half square triangles


We're going to sew them together like so


Make sure your points match up


I pin the part where the points match up and start sewing from the other end. It's hard to get past that bulk if you start there.


Press it open


Now match it up with the corresponding 6" block


This is where you'll probably notice my mistake.
Since I didn't use the correct half square triangle math, that top piece will most likely not be as wide as your 6" block. That's ok. What I want you to do sew the half square triangles onto the 6" block and when you sew them onto the other side of the 6" block, try to match up those center seams where you sewed the half square triangles together. Does that make sense? I forgot to take a picture.


You're going to sew a half square triangle unit onto both sides of your 6" square.


Except for the 12 blocks you set aside, you will only sew a half square triangle unit onto one side.

 I pressed my blocks toward the 6" square. By doing this I'm going to have some bulk when I sew my blocks together, but if I press toward the half square triangles then I have bulk that way. Use your discretion when you press.


This block actually turned out really neat, I didn't have to re-square it

This one, not so much


This is the part where I trimmed my blocks. Just trim them all the way around, try not to trim too much. I found when cutting mine that my 6" square ended up at 5 3/4" wide when it was all said and done. If yours are a little bit bigger or smaller that's fine, just try to make sure they all stay the same size. Also, be careful when trimming where the point of the half square triangles are, you don't want to lose too much of your point when they get sewn together.

See, I just cut slivers off of mine


Get all of your blocks ready, next week we lay them out!


Monday, January 24, 2011

Valentine's Decor

When I was a kid, my mom decked the house out for every single holiday. We had decorations for everything! I know, I know, commericalism and all that jazz... but I love it. I absolutely love getting caught up in fun decor, cute projects, fun themed foods... it's great!

So with Valentine's Day approaching, I thought I needed to bust out some decor. Some Internet searches proved... well... covered in icky hearts. Maybe I'm not traditional enough? I still love the fluff and red and pink and glitz and such, but c'mon, who wants hearts covering every square inch of their house? Not this chick!

I'm very much "in progress", but some of my fun so far has included sun catchers, a table runner with a bit of skull and crossbones for my husband (so he doesn't feel like the pepto-bismol pink puked all over him), and a fun, broken hearted throw pillow!


You can interpret the back of the throw pillow how you'd like. Yes, that's an m&m. We could call it purposeful - chocolate is common on V-day, no? Or perhaps an ode to the single and broken hearted, who may very well spend V-day with chocolate and a chick flick? (Hey, I've done it!)

Or we could just call it the truth and say my 2-year-old hated his m&m Halloween costume, never wore it, and it's all the red fabric I had in the house.

Any other Valentine's decor ideas out there? Help me out!

Half Square Triangles

I'd be lying if I said I like making half square triangles

Truth is, I can't stand them
But I love you guys, so I made a bunch

And now you get to too

Quick disclaimer before we proceed any further:
I did not make this quilt prior to starting the quilt along. I am making it right along with you. And while I checked and double checked and triple checked all of my math before even thinking about starting, I realized I made a couple of teeny tiny mistakes. 
But everything still works as it should, promise. Girl Scouts honor.
The first mistake I made was not cutting our squares at the "normal" half square triangle size. Usually half square triangles are cut at some multiple of an 1/8" instead of 1/4". And I realized it with enough time to fix it, but not until after I posted the fabric requirements. And if we fixed it, we wouldn't have enough fabric. 

So blame it on the late night and the fact that I had just finished making my 1,543,632,234,875 test square, and my 2 year old was most likely trying to use my sewing machine. I may have been a bit distracted.

We'll just consider this quilt along as not only a quilt along, but a tutorial on how to fix math mistakes too. Ok? Ok. 

Also, if you are using fat quarters, please visit this discussion in the Flickr Group if confused. I used a layer cake and forgot a few extra steps that fat quarter users have to take. I think I've edited the posts enough to clear up confusion.


Now, on to the half square triangles.

First, pick 12 of your print fabrics and separate them from the rest of the pack. These are going to be the ones that are on the outside edge of the quilt and will get cut off. So choose wisely and make sure it's a nice mix of your colors.
Of those 12 prints, remove one of the corresponding 3.5" squares and put them in your scrap bin, this will leave you with one 6" square and one 3.5" square of those 12 prints.

Grab a 3.5" print square and a 3.5" solid square


Draw a line down the middle of your solid on the wrong side of the fabric, like so


Put your squares right sides together and sew a seam 1/4" from the line


Then turn it around and sew another seam 1/4" from the line on the other side


Now you have two seams 1/4" on either side of the line


Line your ruler up on that line you drew


And cut it


Press your blocks open


And snip those tails


Each 3.5" print square doubled with a 3.5" solid square will yield two of these blocks.

Now do this with all of your 3.5" squares. 
When you're done you should have 4 of these for every 6" block, except for the 12 we pulled aside. You'll only have 2 of these for those.

If you feel the urge to re-square your half square triangles, go for it. Just be extra careful not to trim too much. I've worked ahead a little bit and did not re-square mine, but chose to re-square later after my blocks were put together. It worked out just fine.

But I'm a firm believer in slow and steady wins the race  ;)

Ok, get to work, we'll see you back next week.

Saturday, January 22, 2011

My Easy Overlapping Pillow Cover

It all started when I decided one day that I was going to try my hand at embroidery

I happened upon this quilt along and stepped out of my usual comfort zone

Then I got addicted

While waiting for the first block to post I started practicing

It started with this

Then I wanted to do more

So I did

Then it turned into a pillow cover a
la Bree's tutorial


They're a match made in Strawberry Heaven


Thursday, January 20, 2011

Slicing the Cake

Do you have some pretty fabric?

Good, now go post a picture of it in the Flickr group. I want to drool over it before you start cutting it up!

After you do that, open it up and pet it for a few minutes, fabric likes to be adored.

Then lay it out and let's start slicing. We're going to cut the layer cake first, then the fat quarter. Just follow the part that pertains to you. 


Layer Cake

First thing we're going to do is cut the 10" square into two pieces

Line your layer cake square up within the grid on your cutting mat


Then measure over 7", lining your ruler up with the vertical line


And make a cut


Take that 3"x10" piece and put it in your scrap bin. Seriously, don't throw it away!

Grab your 7"x10" piece and rotate it so that the 10" side is laying horizontally
Line it up on the markings on your mat again and measure over 3.5"


Cut it off


Now you have two cuts of fabric, one that is 6.5"x7" and one that is 3.5"x7"
Take the 3.5"x7" piece and turn it so the long side is laying horizontally


Now cut it in half, on the 3.5" mark. This will give you two pieces that are 3.5" square


Take the piece that is 6.5"x7" and cut .5" off of the 6.5" side and 1" off of the 7" side so that it ends up 6" square


You will end up with one 6" square and two 3.5" squares


Here is a visual if you need it


If you have another way that you prefer to cut into your layer cake, go for it. The reason I did it this way was to get those long scrap strips. I'm thinking about either using mine for a scrappy border or a scrappy binding. There is another way to cut it that will yield square scraps if you'd rather have that.

Also, when you cut your fabric feel free to use the markings on your ruler instead of the ones on your mat if you prefer and if you have a wide enough ruler.

Fat Quarters

Please read the entire cutting instructions before you get started.

Lay out your fat quarter. It should be a perfect 18"x22" cut. It may be 21", and that's ok. If the edges aren't straight go ahead and straighten them up. Be careful when trimming the 18" side that you don't cut too much, we need the full 18".


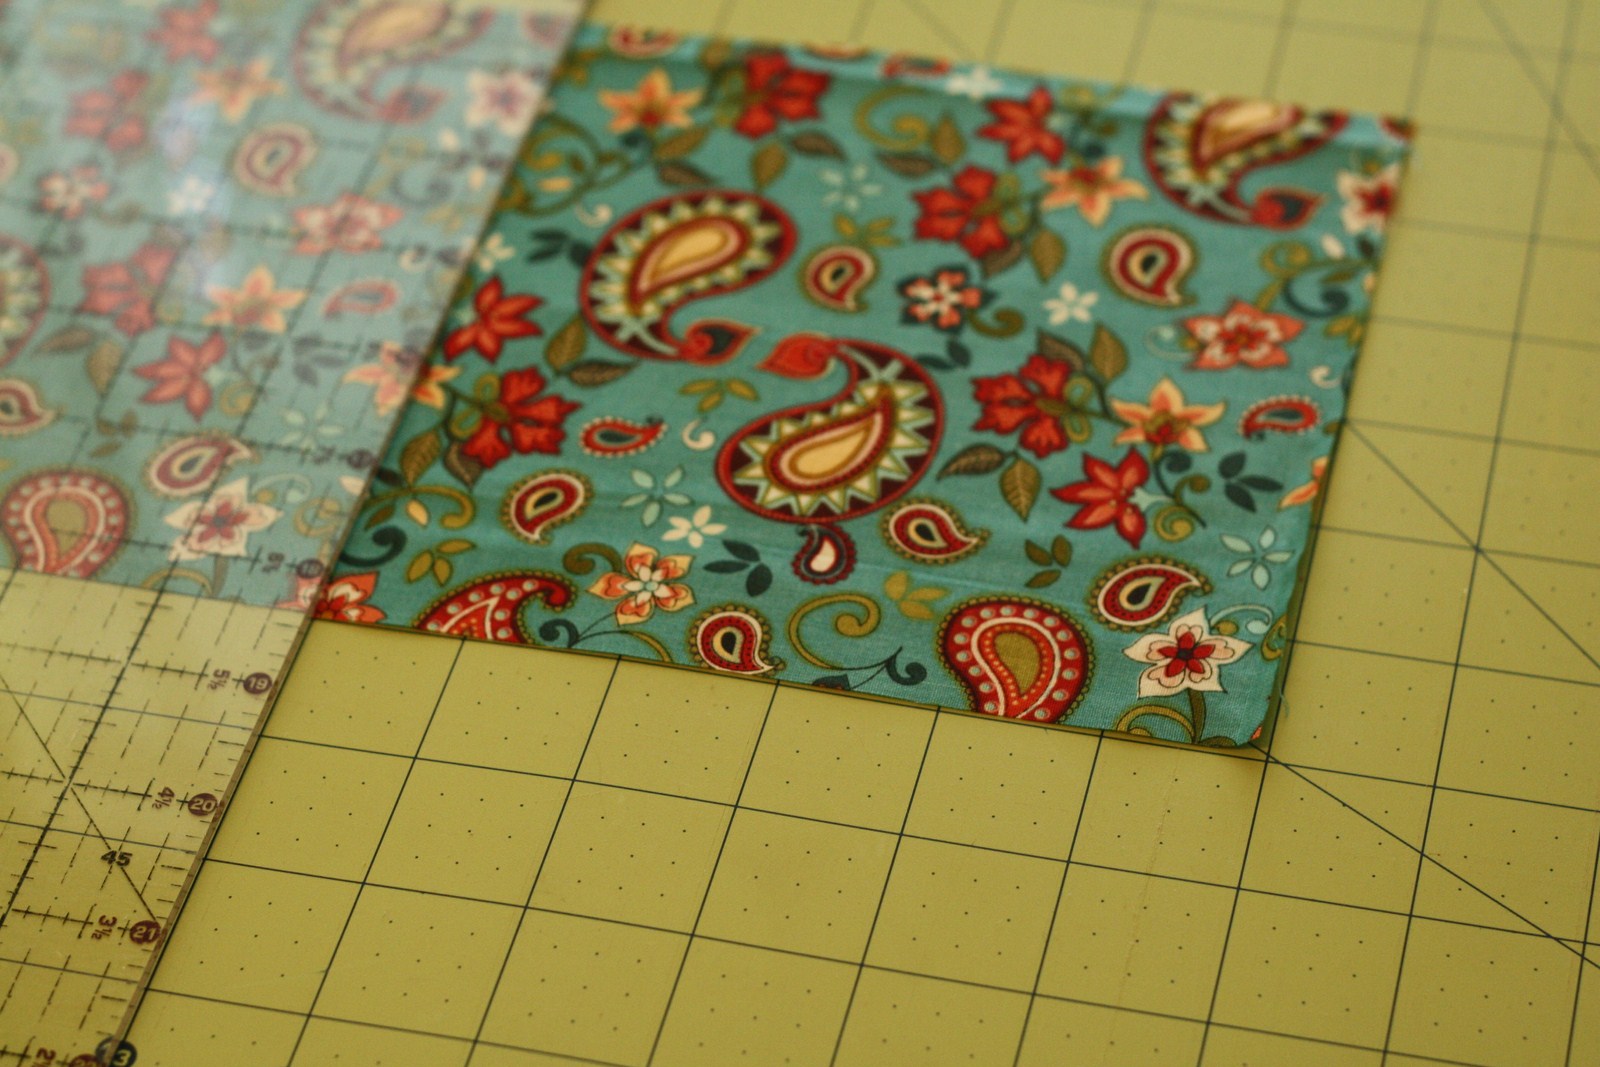
Line it up in the grid on your mat so that the 18" side is vertical and the 22" side is horizontal


Measure 6" (and pretend like mine is lined up on the horizontal line like it's supposed to be)


and make a cut


Measure another 6"


And cut again


Then measure 3.5"


And cut


Measure another 3.5"


And cut again


You should have two 6" strips and two 3.5" strips, plus a scrap. Put that scrap in your scrap bin


Now turn one of your 6" strips horizontally and line it up in the grid


Measure 6"


And cut


Repeat until you have three 6" squares


Then repeat with the other strip


Then put one of those squares in your scrap bin, you only need five.


Now take your 3.5" strip and line it up


Measure 3.5" 


and cut


Repeat until you have five 3.5" squares and a scrap piece, throw that scrap away


Repeat with the other 3.5" strip for a total of ten 3.5" squares


And don't worry, I am NOT using this fabric with the one you saw pictured above, this was just a scrap fabric :)

Here is a visual for cutting the fat quarter if you need it


I only want you to cut 8 of your fat quarters this way!! 

For the 9th, you only need two 6" squares and four 3.5" squares

When you're done you should have 42 6" squares and 84 3.5" squares. Try to keep them together as sets, one 6" and two 3.5" squares in each set.


Cutting your solid

I'm going to refer you to a post from the first quilt along for cutting into your yardage. Reason for this is because apparently Moda Snow has become my go to solid and I have this:


I figured I'd better use it up

Following the instructions from this post:

http://distantpickles.blogspot.com/2009/12/cutting-squares.html

Fold your fabric selvage to selvage and cut your solid into 3.5" strips. You will need to cut 6 strips

Then sub-cut your strips into 3.5" squares. Each strip should yield twelve 3.5" squares for a total of 72 squares.

Put what you have left of your solid aside for now. We are going to do a little bit more cutting on it later.


Get to cutting!