Wednesday, August 31, 2011

Cauldron Crafts is Coming!

Check back tomorrow for the start of our awesome, month-long Hallowen Craftapalooza!

Grab a button and get your craftin' boots on!

Cauldron Crafts with Distant Pickles and Fabric Donkey


Monday, August 22, 2011

String Quilt=Done


Are you looking for the contest and giveaway? Click here!


I bet you thought you wouldn't be seeing me for a couple of weeks, huh? Well, thanks to scheduled posting you can't get rid of me that easy! Bwahahahahaha!!! At this point my computer is on a plane, on it's way to sunny Cali. I thought I'd work up a few posts so you wouldn't miss me too much while it was gone ;)


So I totally thought I would NEVER finish this poor quilt.

string quilt

 I first posted about it back in February and it really was slow going. I LOVE string quilts, but just had no idea how tedious they would be to put together! I had to really push through to finish this one up.

string quilt

Well, I finally got it done and basted and then couldn't figure out how I wanted to quilt it. I knew I wanted something to bring out the diagonal design, so I went with echo quilting the white strips. I stitched about 1/2" on either side of them. I'm really happy with the results, and it went pretty quick too.

string quilt

Then a couple of hours one night in front the of the TV got the binding done. But not after having to machine stitch the one side down twice, because somebody *cough Bug cough* thought it would be fun to turn the tension knob on my machine all the way down to 0. I didn't figure that gem out until I stitched the binding on not one, but two quilts. I still have to fix the other one. Thanks Bug, love you hon!

Somehow, somewhere, I messed up my math and didn't have enough binding fabric, so one part of it is made up of leftovers from the backing. Character right?

string quilt

And just a random thought, Are quilters the only artists who abuse their art by hanging it from random places, like trees?

string quilt

LOL, the tree doesn't seem to mind anyway.


Sunday, August 21, 2011

Cauldron Crafts: A Sneak Peek

Hey Y'all!

So I've been super quiet lately. It's part funk and part insane Halloween crafting. I can't show much yet - but just over a week away and you'll be seeing lots and lots of awesome Halloween crafting here and at the Fabric Donkey!

I've got almost all of my projects sewn up, but gotta get on the writing of the tutorials, posts, and giveaways!

I'll leave you with a few sneaky peeks:


And this one's SUPER secret! Can you guess what it is?


Friday, August 19, 2011

A Kaleidoscopic Finish!

Are you looking for the contest and giveaway? Click here!


What a relief it was to finish this one!

I decided I needed an alternative queen size quilt for our bed when I realized just how hot the denim one I was working on would be to use in the summer. Enter the Kaleidoscope Quilt Along with Don't Call Me Betsy.

I quickly decided to use the fat quarter bundle of Dolce I'd been holding onto and got to work. I started about a week late and had lots of work to do to stay caught up.

Our new bed quilt! Kaleidoscope Quilt Along with Don't Call Me Betsy

 It was a bit challenging for me lining everything up right and getting all of my points to meet in the middle. I accidentally sliced part of my template in the beginning and didn't think it would make a difference so I didn't bother to fix it. Boy was I wrong!

Kaleidoscope close up

So it's less than perfect, but I decided I'm going to love it anyway :)

I ended up pulling off one of the rows because I didn't like how far it hung off the foot of the bed. I used it on the backing instead with some of my favorite prints from the same fabric collection.

back of Kaleidoscope quilt

 I wanted to quilt it by echoing the solid kite pieces but since our current comforter was literally falling apart at the seams, I decided to do something that would go a bit faster and stippled it instead.

Then I was having so much fun that I decided I needed pillowcases and covers too!

Using this tutorial and some leftover solid and scraps I made these two pillowcases

Pillowcases to match new quilt

And some covers too

Pillow covers to match new bed quilt

The only thing I wish I had done differently is use a solid that contrasted with the prints more, but I really like how light and summery it is. It really does brighten up the room.

And man, I had forgotten how comfortable it is sleeping with hand made stuff! My mom made me a quilt when I was younger that I absolutely loved but I've been sleeping under store bought since I flew the coop. We've been sleeping quite peacefully and I've been finding it hard to get out of bed in the mornings. 

I guess I should consider this one a win!

Thanks Elizabeth, for such a fun quilt along. I had a blast!


Wednesday, August 17, 2011

One More WIP Wednesday

Are you looking for the contest and giveaway? Click here!


Has it really been a month since I've done one of these? I keep meaning to but Wednesday just sneaks up on me week after week and next thing I know it's gone, and I never did a post! 

I've gotten lots done, even after being stuck for about a week.


String quilt

Done! I'll post some pictures later so I don't photo bomb this post :)

Bee Blocks

The last blocks I posted finished up the Christmas Bee. It only ran for 6 months and seemed to just fly by! I was able to complete August's block for the 12 Month Bee over the weekend. Amanda sent us some awesome fabric and asked us to make a star block, any star block, featuring her sugar skull print. I used the Love in the Mist pattern for my block. It was really fun considering my aversion to half square triangles!


Farmer's Wife Quilt Along

I'm a bit behind on this one, no progress since the last post. Wow, it's been a month on that too. I'm not worried though, this is a long term one, I have plenty of time to catch up.

Kaleidoscope Quilt Along with Don't Call Me Betsy

Done! Ditto the string quilt, I'll post a separate post later.

 Double Wedding Ring QA

104 out of 254 arcs done. I'm in no hurry on this one either, I'm going to take my time and enjoy the process.

104 down, 150 to go!

 For the Love of Solids Swap

I've been busy stalking my partner and I think what I'm working on will make her very happy. I hope so anyway! This is what I have so far. I'm making smaller "blocks" and am going to join them all into one larger piece later. This way it will hopefully keep it from getting too busy or too messy.


Ogee Quilt Along

I finally pulled this from the "On Hold" list and basted and quilted it! I forgot to get binding fabric for it though so I'm stuck again until I figure it out. I can't wait to show this one off, I made a small change to the pattern and put that pop of pink in it. I think it turned out really cool :)

Bree's Donation quilt

Bree sent me a kit to make a donation quilt for her. I think I've mentioned it once, but it never really made it on my list here. It's almost done! I had some trouble using the double fold binding she sent when I tried to bind it the other night. It's a definite learning curve if you've never used it before. I'm going to tackle it again real soon and finish it up for her.

Christmas Quilt from Christmas Bee
Moving this one to the hold pile for awhile...

Little Faces quilt from 12 Month Christmas bee

I received all of my blocks! This one will go on hold for a bit too...

Projects on hold

Strawberry Lemonade snowball quilt
Strawberry Lemonade Ritzy Cracker quilt
Lollipop Bento Box-I have backing fabric! Look for this one to make it's way up the list soon.
Dill Blossoms hexagon quilt
Denim winter quilt-kept forgetting to put this one on the list!


Man, that is a LOT of projects!! I have a few more that I'm dying to start but want to finish up some of these first before I get too overwhelmed.
Sorry this was so long but I finally received the box to ship my computer off to Toshiba to get fixed, so I'll be silent on the blog for a couple of weeks and figured I'd get one more in while I can.

This will give me some time to put together a prize package for our contest and giveaway, look for a post about that when I'm back online. And check back on September 1st, Bree has been working hard with our friend the Fabric Donkey and they've got some really fun stuff in store for you!

I'm linking up...better late than never, right?

WIP Wednesday at Freshly Pieced


Tuesday, August 16, 2011

You Say Potato, I Say Po-tah-to (aka the potato bag tutorial)


Are you looking for the contest and giveaway? Click HERE!!


I sure do love baked potatoes, but what I don't love is using my gas oven in the summer. I figured why not make a potato bag? And while I'm at it, why not make a tutorial so you can make one too?

Ok, these are easy peasy. Especially if you don't try to fancy it up like I originally did. More on that later.


Materials needed:

Two pieces of 100% cotton fabric-11 inches x 20-22 inches

One piece of 100% cotton batting-cut to same size as your fabric pieces. Warm and Natural works great. They even make a Tater Batting specifically for this project that hasn't been chemically treated. You can just use the regular stuff though.   Update: I recently found out that Warm and Natural batting is NOT 100% cotton. Who'da thunk it? The tater batting that The Warm Company makes IS 100% cotton though. Please look for 100% cotton batting for this project. 

100% cotton thread for piecing.

Please make sure your materials are all 100% cotton. We don't want any fires in our microwaves.

Ready? Let's go!

Grab your two cuts of fabric and batting


Lay them on top of each other in this order:

Lining fabric-right side up
Outer fabric-right side down
batting


Now pin the heck out of the short sides so your batting doesn't shift (don't clip your corners like mine shows, that's part of the story I'm going to tell you later)


Then stitch down the sides, from one end to the other (your walking foot will be really helpful when stitching this bad boy)


Grab the lining fabric


And turn it so it's right sides out and the batting is in the middle.


Give it a good press then topstitch one side only (one of the short sides that you just sewed together)


Now fold down the topstitched edge about 3 inches. Yes, you want your lining to be on the outside as you fold. (and you want to ignore the fact that I took the picture before I remembered to topstitch the edge.)


Then fold up the bottom


You want the edges to overlap by 1/2" to 1"


Now pin that sucker together and stitch down both sides, making sure to go slowly over the part where it overlaps. Also make sure you backstitch or stitch the overlap more than once to secure it.


After stitching, go back and zig zag or serge the edges to finish them


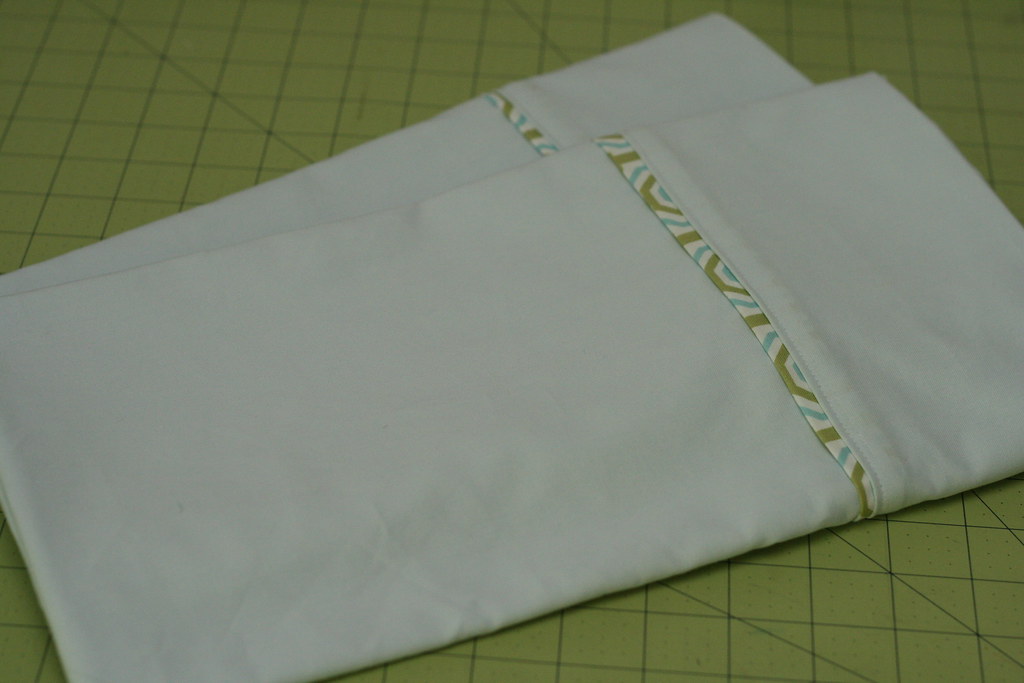
Then flip it right side out and you have yourself a potato bag!


Easy, right?

Ok, here is what NOT to do. I originally thought I couldn't live with the raw edges on the inside of the bag. So, I stitched it all the way around and left an opening for turning. Then I turned it, stitched it closed and then tried to fold it and stitch it shut. Well, that was all fine and dandy until I attempted to sew through about 12 layers of fabric and 3 layers of batting. It wasn't very pretty, and I have a machine that can handle that kind of load! I ended up with a bent needle and a very large and very wonky seam allowance. So, the reason you see cut corners and some previous stitching in some of my pictures is because I ripped it all out and did it this way instead :)

Now for the cooking directions...


Wash and wrap up to 4 medium potatoes in paper towels
Put them in the bag
Put the bag into the microwave, make sure it doesn't touch the walls
Cook for 4-8 minutes

That's it! They come out so nice and fluffy. If you use larger potatoes you need to raise the cook time, just keep an eye on it.

Also, allow the bag to cool completely between batches if you cook more than one.

Oh, and wash it before you use it. Don't use any fabric softener, you don't want those chemicals left in there.

The bag can also be used to cook corn and warm tortillas and rolls!

update: I warmed some tortillas in this for the first time tonight. They went from frozen to perfect in 2 minutes. I'm definitely going to be keeping this in my kitchen!


Sunday, August 14, 2011

It's Our 100th Post!


How about a little celebration and a giveaway?

In honor of our 100th post we would like you, our awesome readers, to get involved. So we are reaching out to those of you who know a bit about graphic design and like to win prizes. Don't know graphic design? That's ok, there is a prize for you too! Just keep on reading!

We want to make over our blog a bit. The biggest thing we want to do is to re-design our header. When Distant Pickles came to be I sort of just found a picture of pickles on the internet, slapped it into Illustrator, and put our name over the top of it. 

I did manage to make the cool shadow underneath it though ;)

Anyway, I'm not that great at graphic design and since that picture was borrowed I've been waiting for the day when an angry email came my way demanding that I take it down.

So here's what to do:


Show us your design, and we'll have a vote. The winner will win a cool prize and the chance to have their design featured as our header. What will the prize be? Well, we're not telling just yet. Mostly because we're still trying to figure it out.  It might be fabric, a bag, a mini quilt, who knows!

Update: We had someone ask if they could submit more than one entry, and the answer is Yes!! Bree and I discussed and decided you can submit up to THREE entries, yay!


What's in it for those of you who aren't participating in the contest? Well, you get to vote for the winner. When it's time, we'll run a post showing off all of the designs. You leave your comment telling us which one you like best, and that's your entry into another giveaway, simple as that!

If you are interested in entering the contest just leave us a comment and we'll get in touch with you.

Since my computer is going to be on it's way to tech support some time this week we'll let the contest run until I get it back (7-10 business days from the day they receive it according to the tech support guy). So we're looking at about the first or second week of September most likely. We'll update with a deadline as soon as I know.

Well, what are you waiting for? Go design!


Wednesday, August 10, 2011

Calling All Smart People!

Because this has been my day...

I'm attempting to post this from my phone. I apologize now for any typos or wonkiness in the post and for the fact that I have absolutely no idea where the picture I'm adding is going to end up on this post.

Anyway, the reason for today's post is to see if any of you, our dear readers, have a knowledge of graphic design and may be willing to design a new header for us?

What if we sweeten the deal by having a little contest for best design with a prize for the winner? If we have enough people willing to help that is :)

Leave us a comment and let us know if you're interested and we'll come up with something fun!

Julie


Monday, August 8, 2011

Stretching My Sewing Muscles


I decided to tackle some bee blocks to help work through my creative funk. For the Christmas Bee both of the Queen Bees for August told us specifically what they wanted, no thinking involved. Or so I thought.

Cassey wanted Drunkard's Path blocks. And well, after having just put together the Ogee Quilt Along top I figured I had this one in the bag! 

Yeah, it's not so easy when you're making it for someone else. You want it to be perfect right?

This is as close as I could get


Even though I know they're pretty good, my inner perfectionist isn't happy. One seam is off on the top circle and they're not perfect circles. But this was my 3rd (4th?) attempt and I'm happy I got this close. I hope Cassey is happy too!

Kari wanted Interlocking Seasons blocks. I was totally up for the challenge when I saw the picture she posted in the Flickr group, then I started sewing. 

Let's just say if my seam ripper and I weren't friends before, we are bosom buddies now.


Overall they were fun to put together. I just either didn't read the directions thoroughly or they weren't very clear and I kept putting the wrong pieces in the wrong spot. Then on the first one I got 3 of the 4 quadrants done to realize that I paired the wrong fabrics together and had to rip an entire quadrant apart. 

Let's just say block #2 went much smoother. And thank you thank you thank you Kari for cutting the pieces for us!! That was a life saver. It took me all afternoon and into the night just to piece the blocks. I can only imagine how long it took to cut the pieces. 

And because I'm showing off bee blocks, here's my last July block.

Corley wanted improv blocks showcasing some fussy cuts


My brain has a hard time with wonky and improv, I'm more of an orderly type of person, but I'm pleased with how it turned out. 

I'm happy to say I'm actually all caught up with my bees for the moment! I have one more to do for August but I'm still waiting on the fabric to arrive, it's going to be a fun one!


Friday, August 5, 2011

A Gorgeous Quilt - $1 Raffle!

Y'all have heard us talk about our pal at the Fabric Donkey before. She's a pretty awesome person, and the deals she posts are a pretty sweet add-on.

So she's got this heart that's huge. Like, 2 sizes two big, ala reformed-Grinch. Made of gold.

She has a friend, Troy. You can read his story here. I'm not good with technical jargon or medical stuff, but the long story short is that he has himself a new liver and a hard time. She's trying to help him out with medical costs by raffling off a gorgeous quilt!


Seriously, drool-worthy, right? I'm totally buying a few raffle spots - I have a pregnant coworker who could use a quilt for the newbie!

So head on over to visit the Fabric Donkey and support a good cause.  One entry is $1.

Wednesday, August 3, 2011

Stuck


Do you ever just feel stuck? 

Like you have plenty to do and the stuff to do it, but just don't know how or where to start?


This may look like I'm hard at work, but I laid it all out there and then sat down and stared at it for about an hour. This has been the story of my life for the past week. 

It seems like every project I want to work on, I can come up with some reason why I can't start it and it's very frustrating.

Ironically, whilst pondering my next move, I was playing with a pin and ended up stuck in more ways than one.


Yes Mom, I'm still biting my nails.

I've made a bit of progress since taking these pictures, hopefully I'll get unstuck soon and back to work. I actually do have quite a bit to show, even if my WIP Wednesday posts have been non-existent :)

I'll be back to show more later...