Tuesday, October 30, 2012

Throwdown Entry


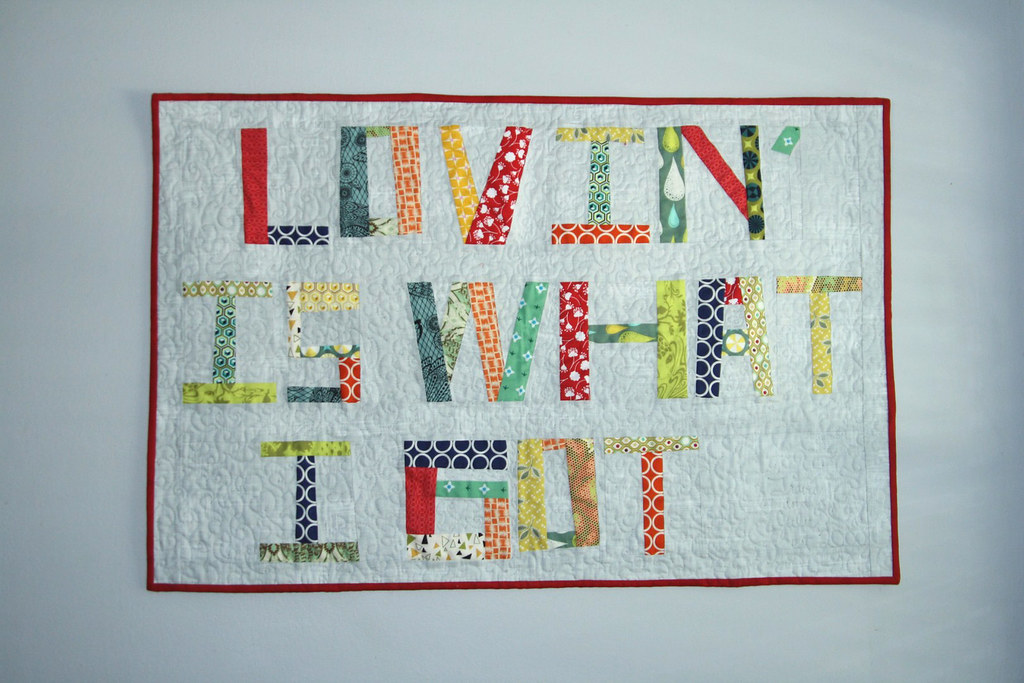
You guys have seen this one before, but now it's entry time!

Remember the Throwdown Challenge that I told you about over at Old Red Barn Co.? The prize is a gift certificate in Dana's shop. Dana makes and sells soaps and sugar scrubs and I have been dying to try them out as I've heard really great stuff about them. But when you have 4 kids, an expensive hobby and only one income, fancy soaps and scrubs tend to fall somewhere down at the bottom of the pile of things to buy. 

So when Dana issued this challenge I jumped at it! I decided to make it a two-fer and also use the completed item as a Pay it Forward gift for Bree.

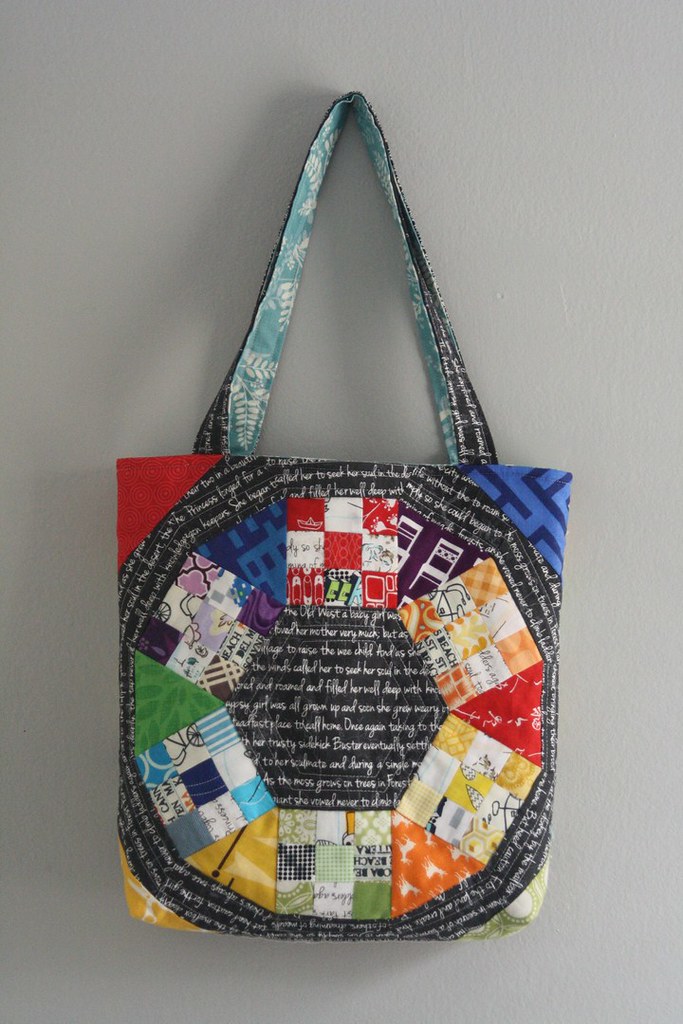
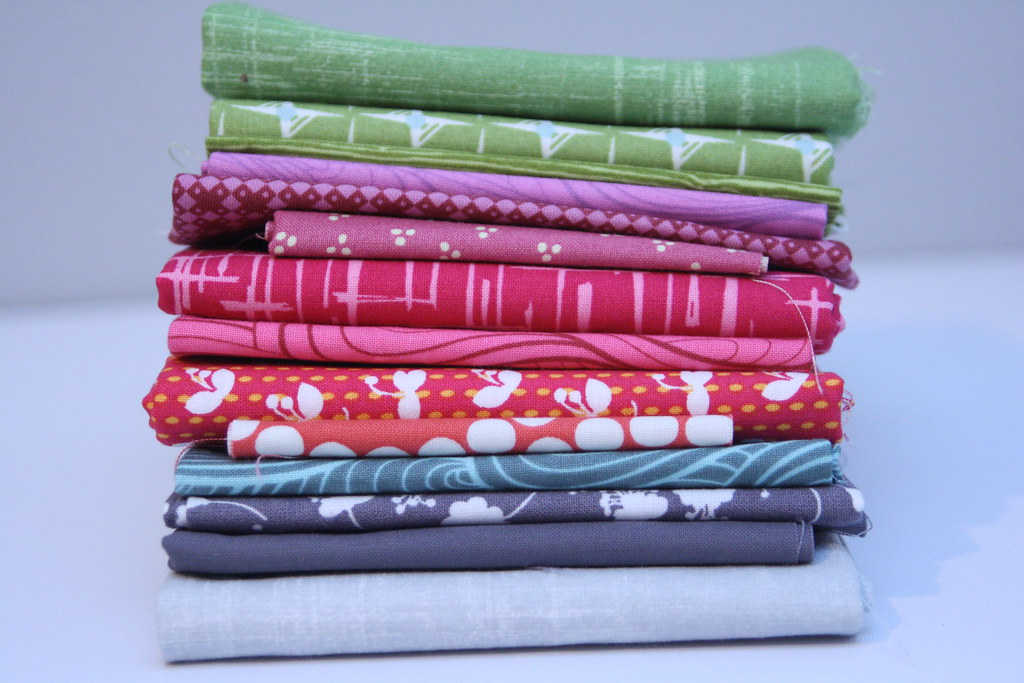
I started with an embroidered pickle. I already had that part done when the challenge was issued, so I needed to find a color palette that incorporated the green and gray threads I had used in the embroidery. 


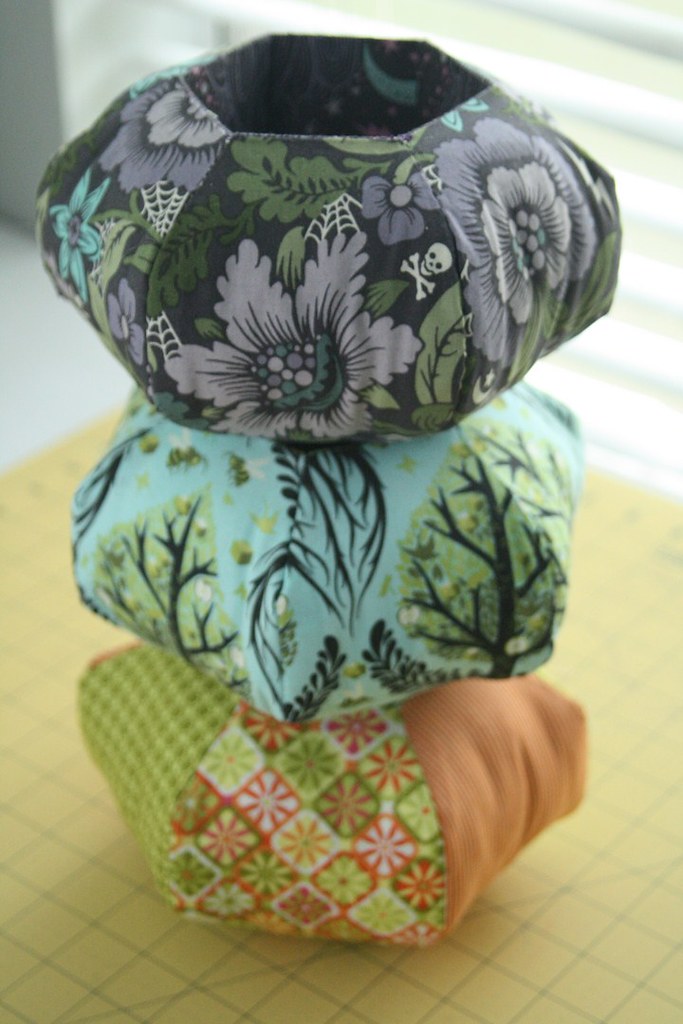
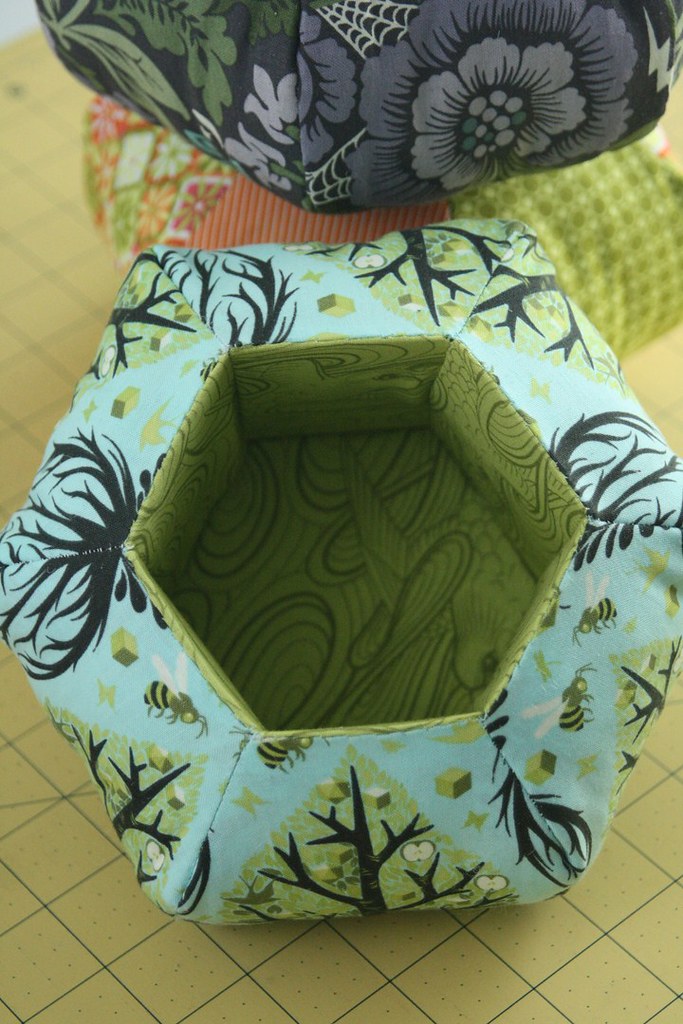
From there I dug through my stash to find fabrics that represented the bundle.

Old Red Barn Co. quilt challenge throwdown

I was a little bit unsure of how she would feel about these picks, so I posted a picture of the bundle and the color palette for her, asking her advice on whether she thought the bundle worked well for the palette. I actually did want the advice, but I was also hoping she would give me a positive comment on the bundle as well, and she did! 

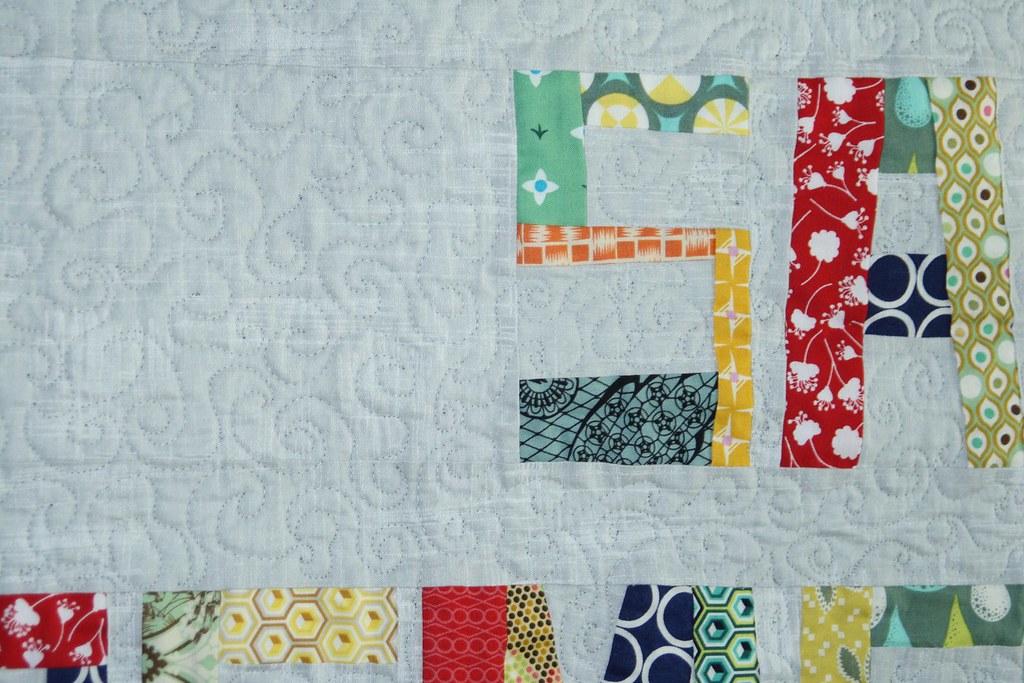
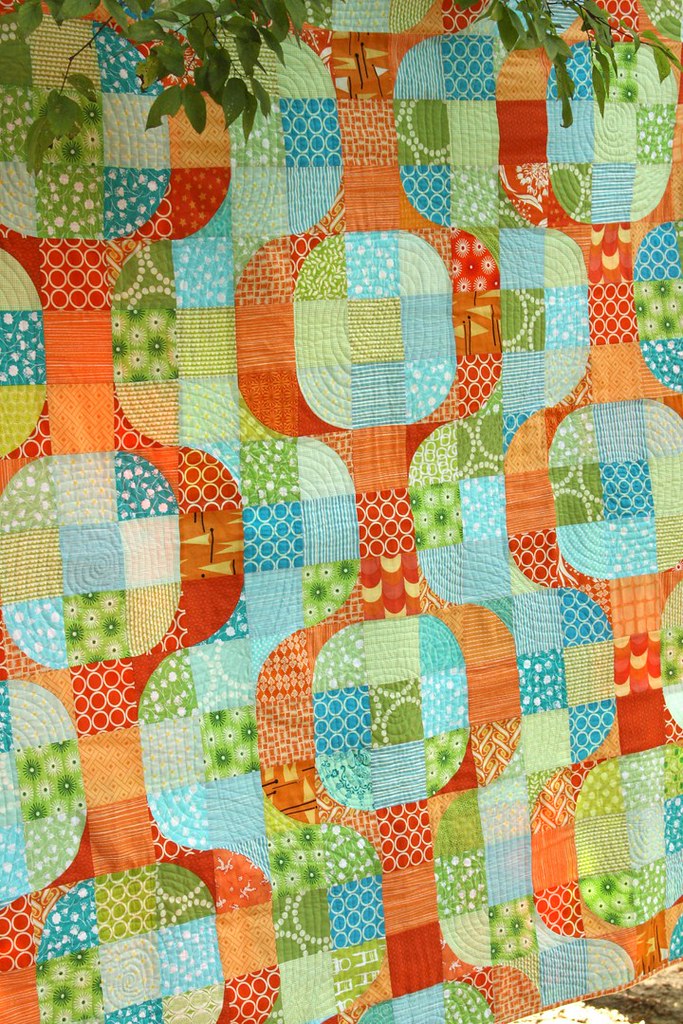
So with that, I carried on. I was inspired by this image to make a hexagon border around the embroidery. I tried machine piecing the hexagons and let me tell you, it's not as easy as the tutorials make you think! I was actually wishing I had hand pieced them at more than on point during the making.

PIF Gift for Bree and Old Red Barn Co. Quilt Challenge Throwdown finish

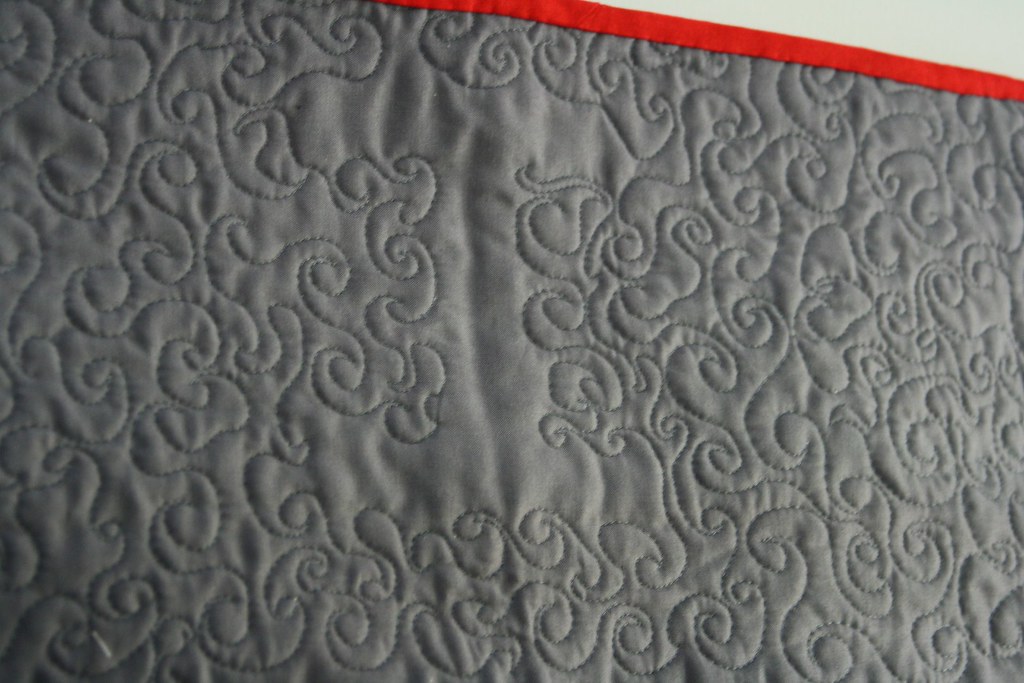
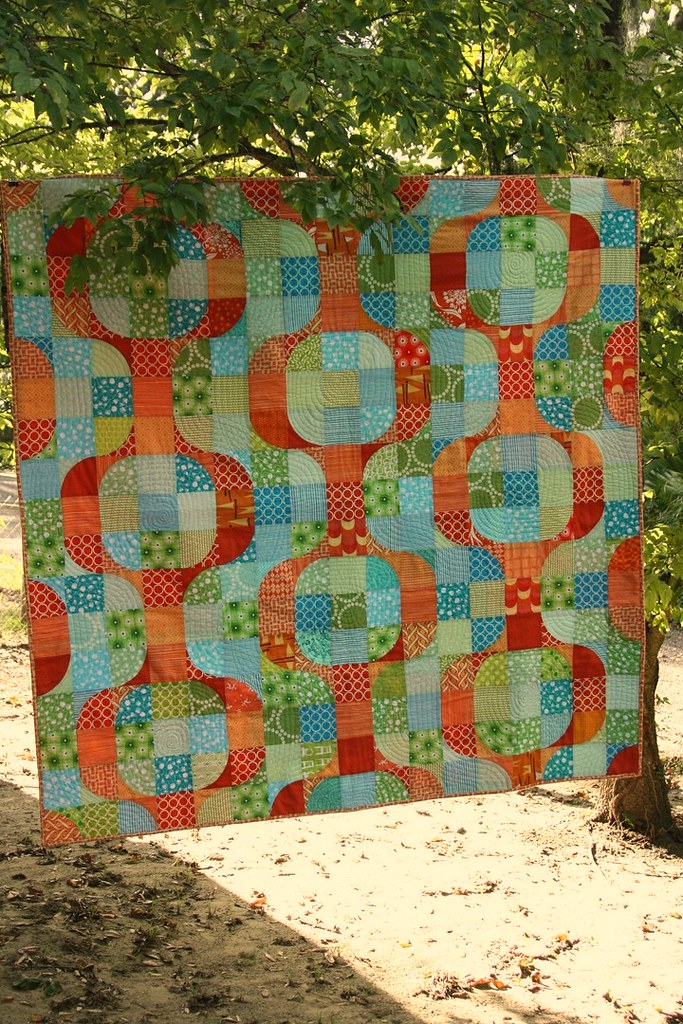
I finished it off by sandwiching just the top with a piece of batting and free motion quilting swirls in the border only. I have been watching Angela Walter's quilting class on Craftsy and was really inspired to try something new. Then I sewed the quilted piece and the backing right sides together and flipped it right sides out. A topstitch all the way around completed it.

There were a few other challenging parts, namely trying to piece the embroidery into the border with completely ruining the look of the hexagons in the corners. They did get a teeny bit wonkified though. 

And because it's always interesting to me to hear about the non-sewing challenges that go into the making of an item, I have another fun little tidbit for you. Moose, being the 2 year old that he is, loves to color. He loves to color so much that we are in the process of repainting our walls because between his and his sister's doodles, it's just too much for a magic eraser to clean up. He found my finished embroidery piece on my cutting table, along with my chalk marking pencils, and apparently he thought it needed some more color! So this finished piece is embroidery number 2. Those chalk pencils don't come off as easy as they say they do unfortunately. It all worked out ok in the end though. When I did the first embroidery I didn't have a plan, and it turned out not to be the right size for the hexagon border as it was. So this way I was able to customize it and get a better fit. So he actually kind of saved me a little bit :)


Sunday, October 28, 2012

Captain Cole: A Pirate Doll Tutorial

Hey y'all! I'm over at Riley Blake again tomorrow with a new tutorial for this fabulously adorable pirate dolls - and bonus Pirate Pack and Treasure Map Quilt! That's a three-fer, folks! The tutorial includes full photo instructions for all three items, plus downloadable template pieces for the doll.


Go check out the full tutorial at Cutting Corners College, and let me know what you think!


Friday, October 26, 2012

Blogger's Quilt Festival-Julie

It's that time again! 

When the Blogger's Quilt Festival comes around, I like to try to pick a quilt to show off that means something to me. Well, I guess they all mean something, but some of them are just a bit more special than others, you now? 

This time around I'd like to introduce you to Mod Pop, my very first pattern quilt. My regular readers have seen this quilt over and over again, and I apologize for shoving it down your throats yet again. I'm just so darn proud of it! 

Mod Pop Cover Girl

I had a lot of fun drawing this one up and then planning the fabrics for it. Bree was a huge help in fabric selection. I think it took longer to pick fabrics for it then it did to draw and then sew it! I really love blues and greens and that splash of orange really made it pop for me.

Mod Pop complete

I dug through my solids stash to find all the blues, greens and oranges that I had and then pieced the backing together, also throwing in a few scraps from the front. It was like putting together a puzzle and a lot of fun!

Mod Pop back

I did the quilting myself, on my home machine. I started by echoing the curves of the "beads". Then I quilted a spiral inside of each one. You can see the quilting better in this shot.

Mod pop closeup of quilting

Here are the quilt stats for the festival:

Name: Mod Pop
Designed and sewn by: Me
Quilted by: Me
Throw size, approximately 60x60

There is a quilt along going on right now using the pattern. You should go check out the Flickr group to see all of the different variations on the pattern. They all look so great!!

Thanks so much for stopping by. I hope you love Mod Pop as much as I do. Enjoy the festival!!


Amy's Creative Side

Thursday, October 25, 2012

Blogger's Quilt Festival: Bree

Time for Blogger's Quilt festival again! I seriously love this festival and all the eye candy that goes along with it every year!
I usually try to post a quilt that has a deep meaning to me. I'm an emotional quilter. This time, though, we're staying light.

My quilt for the fall festival is my Gypsy Dance Quilt!

This quilt has no special meaning to me. I didn't make it for anyone near and dear to my heart. It doesn't symbolize anything. I made it because... I LIKED IT! How novel, right? The fabrics are all stash fabrics that I simply loved. It's bright and lovely and makes me happy! The pattern is available in my craftsy shop, linked on the sidebar. 


My favorite part of this is the quilting. I made medallions in the centers of the latticework, and pebbles everywhere else. Pebbles are time consuming, y'all!


The stats for the festival?

Name: Gypsy Dance
Designed and sewn by: Me
Quilted by: Me
Baby Size/Crib Size - 36x45

Thanks for stopping by! Go check out the rest of the festival at Amy's Creative Side!


Amy's Creative Side

I Owe You Guys a Post!


I've gotten some comments on both the box bag I made using Aneela's tutorial, asking what changes I made to it, and also on my finished fabric basket, wanting to see the finished product. I've been meaning to post them and just can't seem to get the words out or something. And you know me, when am I ever at a loss for words? 

So, while the kids and the husband are all sleeping, I'm taking a moment to put my thoughts together and get this posted!

For the box bag, I followed Aneela's instructions exactly when it came to construction. They were very well written and didn't leave me asking any questions whatsoever.

box bag made from Aneela Hoey's tutorial

The difference in hers and mine was in the interfacing. I really wanted this to be stiff and to keep it's shape well, no matter what I put in it. So in lieu of the medium weight interfacing she calls for, I substituted peltex. Except it would have been a nightmare to sew with it in place, so I didn't. 

I sewed the bag together without anything in it at all. Then I left a bigger opening in steps 26 and 33 of her tutorial than the directions call for. 
 

I cut 2 pieces of peltex out in the shape of the oval, one for the top and one for the bottom. You can trace the pattern piece and then trim some of it off the edges, all the way around, so it will fit inside the seam allowance.


I slipped the peltex into the openings I left and then hand stitched them closed from there.

As for the sides of the bag, I completely forgot to take a picture so I'm going to tell you and hope you can picture what I did! 

In step 9 of the tutorial, Aneela has you sew the short ends of each strip for the sides of the bag together. For the lining piece, I only stitched about a 1/2 inch from each edge and left the middle of the short edge open. Then I continued to make the bag as per the rest of the instructions. When it was sewn together, the lining left an opening so that I could insert the peltex through it and have it sandwich in between the two fabrics.

Cut a strip of peltex about a half inch narrower than the strip of her pattern piece. I cut mine a tad bit longer than the pattern piece and then trimmed it down to size after I got it inserted into the bag.

Slip it into that opening in the lining and slide it through, all the way around the bag. If you have trouble you can cut it a bit narrower to ease it through. Also, had I thought of this before I got it halfway through the bag I would have done it. Clip the corners of the edge that you're inserting and trying to put through, so that it's tapered. That will keep the edges from catching on your seams and should make it easier to feed.

Once I got the peltex pieces in I hand stitched the openings closed and it was done!  

If you have any questions and need some guidance, just ask. I do plan on making at least one more of these in the future, I can always take some better pictures explaining it :)

Oh, and because a friend asked, I took a picture of it next to my pouch and with some items for size comparison. 

Here it is next to that pouch I received in the swap.


You can see how much my pouch can hold. It can also fit a 6" embroidery hoop perfectly within it's walls.


I took some of the items out of the big pouch and put them in the smaller one.


It's quite a difference but the little one still holds quite a lot! Also notice how well the walls are standing up with that peltex in them.


Now, for the fabric bowl!


I totally love this thing you guys. It is just perfect. It's already all set up, catching fabric scraps for me.


It was incredibly addictive to make and I can see many more of these in my future. I would have liked this one to be just a tad bit bigger, but I ran out of cording and I wanted to finish it so badly! I bet I can add to it later if I'm careful about it.

I want to end this post with a quick little note. You guys have been leaving such lovely comments for me, and I know I haven't responded to all of them lately and for that I'm sorry. I work my way through my inbox, little by little, and sometimes get a bit overwhelmed and just walk away for a bit. Plus, my husband has been working extra extra hours the past couple of months, which means I'm pulling his load at home and some of my responsibilities are falling to the wayside. I just wanted to say that I don't mean to, and will not completely, ignore your kind words. I'll dig them all out of the inbox eventually! I do read them as they come in and respond to the ones that have questions as soon as a I can, so don't fret that you won't hear back if you do have a question for me.

I have been getting some sewing in when I can and have some more fun stuff to share. Oh, and Blogger's Quilt Festival starts Friday, so we'll both be back then with more! We'll see you then!


Monday, October 22, 2012

Sorta Summit: The Class Schedule!

Hey Guys! Remember me talking about our idea for Sorta Summit a few weeks ago?
We've been hard at work prepping classes and gathering sponsors! We've set the dates. We've gathered teachers. We have a class schedule. Are you ready for sheer online awesomeness?!

We are running this puppy November 17 & 18, 2012. In a month, folks!
We're hosting a chat group on facebook - link will come closer to the date.
Each class will be hosted as a tutorial on the individual teacher's blog. A google hangout group will be posted at the time of the class, so up to 9 people can hop on and chat with the teacher as she goes through the individual steps on the blog. All classes except the machine feet class and photography class will be on the hangout format - those two will be set up more as lectures. You can always visit the facebook group for q&a and a chat-through of the steps during the class time if you don't have a webcam or the chat happens to be full.
Sarah and I will also be hosting open sew sessions during the machine feet and photography classes, so if you're wanting to hop on and chat and just sew with the google hangout format but aren't taking one of those classes, feel free to join us!

As for the class schedule, we have a smattering of awesomeness for you - pouches, lectures, quilt blocks, quilt techniques, apparel - you name it! A huge thanks to all our teaching volunteers!

Saturday, November 17th

10:00am - Mali @ Seersucker, Snuggles & Soup is doing a children’s clothing tutorial
12:30pm - Jennifer@ Second Hand Dinosaur -  a photography class
Lunch
4:00pm - Sarah @ Sarie Cherries - drafting/sewing a perfect fit pencil skirt (adult size)
6:30pm - Bree @ My Crafty Crap – a zip pouch class


Sunday,  November 18th
10:00am - Colby @ Sew. Quilt. Explore –  Rainbow Starburst String Block
12:30p - Julie @ Distant Pickles – a class on sewing machine feet types and uses
Lunch
4:00pm - Bree @ Distant Pickles - a class on binding
6:30pm - Beth @ Plum and June – quilt as you go
9:00pm - Heidi @ Buttons and Butterflies –English paper piecing

Keep your eyes peeled in the coming weeks - I'll be posting class descriptions individually with supply lists so you can get what you need ahead of time! We also hope to have some awesome sponsors for some really cool giveaways, so more info on those will be posted too!

Saturday, October 20, 2012

Trying Something New


I thought I'd try something new tonight


My little helper is trying something new too


"Oval?" he says


We're having fun naming the colors as they show up under the needle 


Who says you can't learn and have fun at the same time?


Monday, October 15, 2012

Pay it Forward #3 and #4, Done!


It has taken me almost all year but I've got two more pay it forward gifts finally done, sent off and received! 

PIF #3 went to Bree, my pickle partner in crime. Remember these sneak peeks I kept posting?

They turned into these hexie caddies via this tutorial.

Hexie Caddies made from tutorial at Penny's Hands

Bree received the orange and green one made from California Dreamin' by Jenean Morrison, mine is The Birds and The Bees one in the middle and the Nightshade one went to PIF recipient #4, Dede (more on her in a second.)

I have been wanting to make a caddy for myself for a long time now, I was happy to be able to make some for my friends as well. They are completely hand sewn and took quite a bit of time, but they were quite fun and VERY useful.

Hexie Caddy made from tutorial at Penny's Hands

Bree also received this little mini

PIF Gift for Bree and Old Red Barn Co. Quilt Challenge Throwdown finish

because she IS a big dill. I also doubled up on her PIF by making this my project for the Old Red Barn Co. Quilt Challenge Throwdown, so you'll be hearing more about this later when I'm ready to link it up!

Dede was recipient #4. Along with the Nightshade Caddy pictured above, she also received a little box bag, made using Aneela Hoey's tutorial.

box bag made from Aneela Hoey's tutorial

Dede has a really fun taste in fabrics and sometimes I'm a bit unsure of what she would like. Fortunately, she has a pinterest board devoted to fabric that she loves!

Inside of box bag-made using Aneela Hoey's tutorial

I'm going to write up a separate post about the box bag later. I took some pictures because I'm trying really hard to do more "in progress" pics for you guys, and also because I made a few little changes I want to tell you about.

That's four down and only two more to go, with 2 1/2 months left of the year. I think I can pull it off!


Saturday, October 13, 2012

Mouthy Stitches Swap, Round 2

I've really been limiting my participation in swaps and bees this year, the stress was a bit much with all that I had committed myself to in the past and I really wanted to try to avoid that. 

But when the Mouthy Stitches Swap opened up for sign ups for round 2 I jumped at the chance. I had such a blast in round one and received the best pouch ever, I HAD to participate again.

One thing I really love about this swap is that it is strict with what we can and cannot send to each other. There is no added stress of whether we're sending enough, or if we should send extras, etc. We are allowed to make one thing, and it's predetermined my our swap mamas, and we can only send one extra, which is also predetermined.

This go around we all had to follow the Skip to My Lou tote bag pattern. We were allowed to get creative with the design, but it had to be that particular pattern.

My partner has an awesome inspiration mosaic and her tastes are right up my alley. I don't want to say too much and possibly give her away, so how about just some pictures for now.

Here is the front of the bag, the block pattern is called Jack's Chain and can be found here.

Mouthy Stitches tote front

Here's the back. I did a bit of snooping on her blog and determined that she likes selvage projects. I hope I'm right!

Mouthy Stitches back

The pattern is for a reversible tote bag, so I wanted to get creative with the inside, just not as busy as the outside. That way, if she wants to have a not-so-busy bag she can just flip it inside out. I embroidered her name on it and since it's a secret swap, we'll just keep that blanked out for now.

Mouthy Stitches tote, reversible/alternate side. Who is hiding under that blank spot?

The required extra for this swap is a key fob, any key fob, as long as we make it. I fell in love with this little pouch one when I first saw it. It was SO easy to make. It's a bit wonky unfortunately, I hope she doesn't mind. Sewing a circle wasn't as easy as I thought it would be!

key fob for Mouthy Stitches swap

Now I have to wait a WHOLE WEEK before I can send it out! I've never been this early to finish a swap!! But it's done, and off of my list, and that's a relief.


Thursday, October 4, 2012

Cathedral Window Sampler QAL


I've always wanted to make cathedral windows but have always been turned off by the amount of fabric used for each one. It's a LOT. 

But when I saw the Cathedral Window Sampler QAL I couldn't resist the pull any longer. I really liked the idea of cathedral windows done in different ways.

Here's block one!

Cathedral Window Sampler QAL Block 1

I'm attempting to use my rainbow charms and rainbow layer cake from the swaps I've participated in, which means reworking of the blocks and of the final piece, and that's ok. If I get to a block where charm or layer cake squares won't work then I can always pull from my stash.

I'm hoping for some scrappy, rainbowy goodness by the time it's done!

Block 2 posted today, it looks like a lot of fun and I can't wait to get started on that one! I have birthday party prep to attend to first, Moose turned 2 on Monday and we're celebrating tonight! So back to cake making and present wrapping I go.


Tuesday, October 2, 2012

The Anniversary Gift


I know I promised a post on this yesterday, but the day got a bit out of hand. Sorry 'bout that!

Today looks to be just as busy but since I'm sitting here chatting with the Talkin' Tuesday group on Twitter, I thought I could take a moment to type this up too!

The gift was well received! Well, I think so anyway, he's not very excitable. I think that's why I am, I have to make up for him ;)

Lovin', Is What I Got

The quotes are from our song "What I Got" by Sublime. It's not your conventional love song, but that's ok. It's still ours.

I Said Remember That

I branched out and tried something new with the quilting. I knew I wanted something dense, and to not quilt the letters so they would stand out. Bree suggested sharp stippling, from the Free Motion Quilting Project. I aimed for it when I started but something else came out!

Closeup of the quilting

I really love how it makes the letters look gothic on the back.

Back of the minis

I quilted a little hidden gem into it. I totally pointed it out though, he would have never seen it on his own and I would have been driven mad waiting for him to!

A little hidden gem in the quilting.

These will hang in our living room when we finally paint it. I've only been saying that for how many months now? Soon! And I'll get better, non-shadowy pictures too!

I made this in conjuction with the Proverbial Quilt Along with Poppyprint. You should check out the Flickr group, there is some good stuff happening there!