Sunday, March 31, 2013

Blogger's Block of the Month (Peach Patch Quilts)

Hey y'all! It's been like.. forever since I've blogged. I know, I seriously suck. If someone could give me some Mac lessons... I am sincerely inept at Mac blogging. Photos don't move right and... it's just ugly.

BUT! I agreed to do the block of the month tutorial with Dhia over at Peach Patch Quilts, so this hurdle of mac-ineptitude must be overcome!

So, here's the list of all the other block of the month tutorials. 
There have been quite a few, all 9.5" blocks. You can make one, or all, make yourself a sampler quilt, send a few blocks to Margaret's Hope Chest.. whatever! The tutorials are for your use.

For my block tutorial, I chose to modernize an old favorite, the bear paw quilt block. A traditional bear paw has four smaller blocks, and I'll show you how to do that as well, but this tutorial is for a singular paw - I'm calling it the Lucky Bear Paw quilt block. (Did anyone else have lucky rabbit's feet as a kid?)

For this block, you'll need four squares of fabric. One focal fabric cut at 6.5" square, one coordinating print cut at 5.5" square for the "claws", a background solid cut at 5.5" square, and a background square cut at 3.5".


 From here, you'll pick up your background square and print square measuring at 5.5" square each, and place them right sides together.
Sew around all four sides, leaving NO OPENINGS. (Yes, for real)
Bring this little enclosed sandwich to your cutting table and slice it across both diagonals, in an X shape, as shown.


Open your four new Half-Square Triangle Units. Marvel for a minute, then press them. I like starch, it keeps things nice and square!


Grab your 6.5" square, your 3.5" background square, and your four new HST units and lay out on your table as shown:


Ooooh!!!
Now, sew those top three squares together to form one row, and sew the two HST units on the side together. You'll be left with this:


Lookin' like a block, folks!

Stitch your little side unit of the 2 HSTs to your 6.5" square:


And then stitch that top "row" to your newly created almost-a-block unit


WHOA! yes, it's totally seriously that simple. 
This block can be laid out and used several ways. All in one direction, to emulate a walking bear's path in the snow? Sure!


Oh, or perhaps four together, to create somewhat of a sunburst?


Or you can go with the traditional layout and add some sashing between the blocks for this layout:


Whatever you decide to do, let us know! Post your finished blocks in the Peach Patch Quilts Blogger's Block of the Month Flickr Group!

And now that I've conquered this mac-ineptitude, maybe I shall post a bit more. I've only made like 20 quilts since I saw y'all last!


Saturday, March 23, 2013

Claiming the Blog on Bloglovin'


Follow my blog with Bloglovin

Silly Google, don't they know how much traffic they're turning away? Oh well, writing this post up real quick to claim our blog. Eventually I'll figure out how to add it to the sidebar. 

I'm back from AZ, came back with a raging toothache and I think an infection because of said tooth to boot. Spent about 4 days out for the count, between being in pain, visiting the dentist, and being spaced out on pain pills. Finally decided yesterday that I was going to stop taking the hard stuff and stick with motrin for the pain. Still have more dentist visits in the future to fix the problem, but at least I can function right now. 

I'll write up more about my trip and what I've been doing since I'm no longer feeling like a space cadet soon, still trying to get my behind and head wired together here. 

Thanks for sticking around, hope you find your way around this whole Google mess!


Tuesday, March 12, 2013

Last Minute Details


I'll be heading out in the wee hours of the morning on Thursday, out to AZ to attend my Grandpa's memorial service. I haven't been back to AZ in about 9 years and am very excited to see all of my family! I really wish the circumstances were different but it will still be great to see everybody. This is the first time in about 5 years that all of my siblings will be in one place, I can't wait to see them all!

I'm wrapping up last minute stuff here before I go and leave the husband with all of the kids for the weekend. You know, the laundry, the grocery shopping, all those goodies.

I'm also wrapping up some things for my business. That's right, I said business. Friends, Julie Pickles Designs is no longer just a group of words on a pattern cover. Things just got real around here.


Turns out, I should have had these before I started selling patterns. I had no clue! So, here they are and now I can safely sell patterns and go to craft shows. I'm officially official!

Speaking of patterns, remember me mentioning having THREE in the works? They are all out for testing! My testers have had them for a couple of weeks now. I have been hard at work on the cover models too. I think I have everything wrapped up that I need before I go. By the time I get back and finish mine they should be finishing up testing. The goal for release is the end of this month!

I decided a needed a new bag for the trip too.

Yes, I know, it's been mere months since I made the last one. Have I mentioned how much I love bags? 

This time I've chosen the Emmaline Bag to make. 

The bag has a lot of pleats so I thought I'd leave out the thicker interfacings. But then this happened.


Um, yeah, that won't do.

So I thought I'd add fleece to the lining instead, but even the lining has pleats. And I added a zipper pocket, so I had to figure that out too.

A little bit of brain power (which I seem to be running low on these days) and I had an answer.

I laid a big square piece of fleece over the lining with the pocket attached, and then felt for the zipper and drew a rectangle on the fleece over where the zipper was laying. I made it a bit bigger to allow for the fabric of the pocket too. (and I really wish I had taken a picture of these before I fused it)

I cut that rectangle out and fed the pocket through it, then laid the fleece on top of the lining piece. I fused it in a few places and then used the lining piece as a pattern to cut the excess fleece away. 

Here is the lining with the fleece attached and the pocket sticking out of it. (That pocket is not as large as it looks by the way). 


If you look at the bottom, you can see where I cut a pieces of the fleece out for the pleats. I didn't do that for the last bag and it wasn't as fun to make the pleats with all of that bulk!

So far, so good!


Those rectangle rings are pretty heavy, it definitely needed that extra support. We'll see how well it does once I get the false bottom put in and add the straps. The false bottom made a HUGE difference in the support of the weekender, I'm hoping for the same for this. I'll report back when it's done!

And in case you are ever wondering what my children are doing when I sew...I took the above pictures while sitting in my sewing chair.

Here's Moose


And Bug, sitting on my leg


They definitely keep things interesting!


Thursday, March 7, 2013

A Lovely Year of Finishes-March Goal Setting


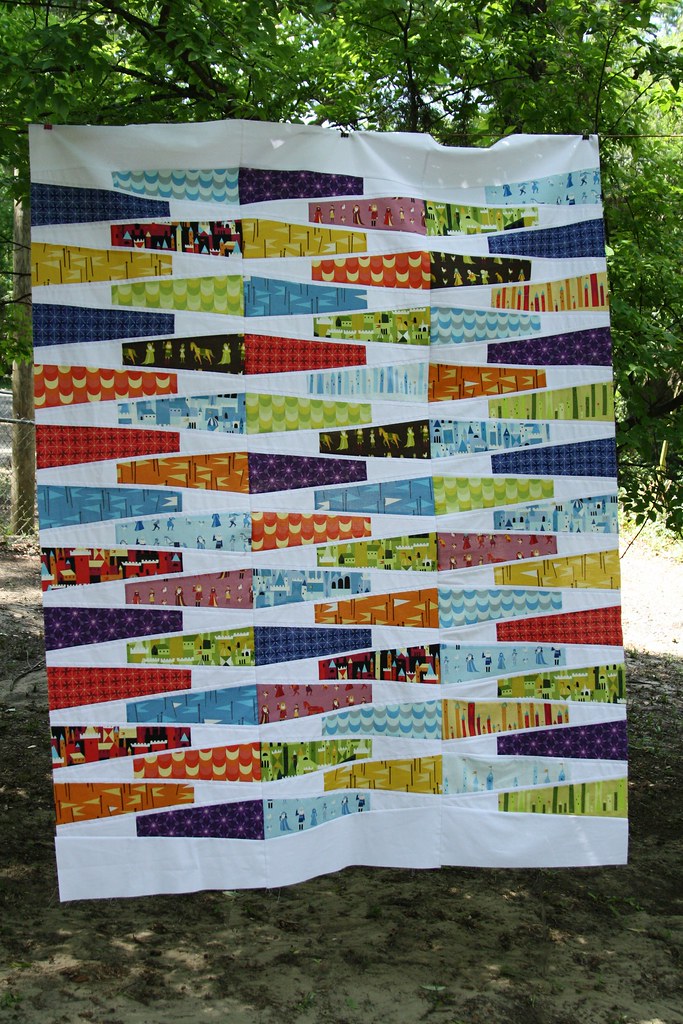
Alright Castle Peeps wedge quilt, this is your month!

My Precious QAL completed top

I promise this will be the last time you see this same old picture of this quilt top because it will be DONE by the end of this month (I'm actually hoping for more like the end of this week!!)

That's it for this month. I have a TON of other stuff going on behind the scenes here. I'll share some more on that when I get a small moment to breathe. It's all exciting stuff though!