Are you ready to finish this up? Me too!
This is going to be a long post, but only because I'm picture happy. I'm going to show you how to trim it and bind it. It may seem like a ton of steps, but it's just a ton of pictures. So don't panic! Ready? Here we go!
Trimming the Quilt
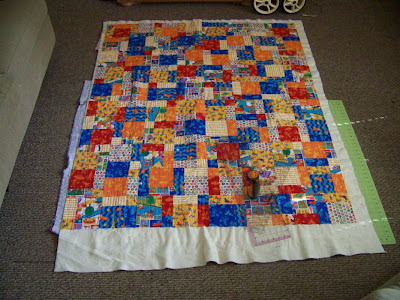
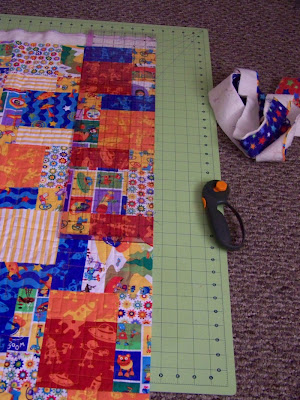
I find it easiest to do this step with a big surface, so I move to the floor. Bring your self healing mat, rotary cutter and ruler(s) with you.
I have two rulers but you can use just one or you can use an easy square. If you have two, set them on one of the corners of your quilt like so:
And here they are on my quilt, very hard to see since they're clear and the quilt is so colorful!
Now trim the corner. If you only have one ruler, just put that in the corner and trim around it.
Move your mat up, line your ruler up with the cut you've already made, and continue to trim
All the way to the next corner
Now go back to the other side that you started trimming on that first corner and finish it up
I trimmed my quilt starting with the bottom and the right side. I rotated the quilt around though because my living room is teeny tiny and I was having trouble maneuvering. So don't get confused in the next picture!
Using your ruler(s) like you did with the first corner, line them up on one of the uncut corners and begin trimming.
Continue all the way around the quilt until it's completely trimmed.
Fold the quilt in half, matching corners, to make sure it's square
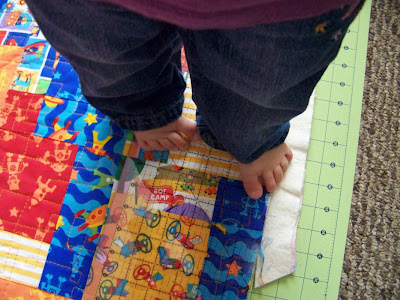
Don't forget to enlist the aid of your favorite helper
My helper likes to hold the ruler down for me
Making your own binding
You can purchase already made binding in the store. I like to make my own because then I'm not limited to whatever the store sells. If you want to purchase pre-made binding, go for it! I'll show you how to make your own though if you'd prefer to do that.
Take your cut of fabric and fold it, wrong sides together, from selvage to selvage.
Then fold it again
Now rotate it (is this looking familiar?)
Line the fabric up so the fold is on a horizontal line and the cut side of the fabric is just to the right of a vertical line.
Trim that edge off
Now we're going to cut 2.5" strips
Continue to cut 2.5" strips until you have as many as you need
But how many strips do I need you ask? Here's how you figure it out. Measure the sides of your quilt, mine ended up being 53"x64". You need to add the measurements of the four sides together. In my case 53+53+64+64=234. Your strip of fabrics will measure approximately 44" long, so divide the added inches of your quilt by 44". For my quilt 234 divided by 44 equals 5.3, so I will need 6 strips because you'll round that number up. You are also going to need some extra length because you'll want your binding to overlap so give yourself at least an extra 12 inches. If it comes up that you'll need 5.8 for example, go ahead and cut 7 strips because if you only cut 6 you may be short. This will make more sense later.
Now that you have your strips cut, we're going to sew them together. First thing you may want to do is cut off the selvages. I haven't had to do this in the past because they tend to disappear when the strips are sewn together. But with the fabric I'm using the selvages are larger than normal so I went ahead and cut mine. I guess the point of all that rambling is that you may be able to get away without cutting yours off!
Now lay the strips together, right sides together, as pictured below
You are going to sew a seam from one corner to the other, again as pictured below. Feel free to mark a line to follow if it helps.
When you get that seam sewn together, use your ruler and measure 1/4" from the seam and cut
Now open it up and there you go!
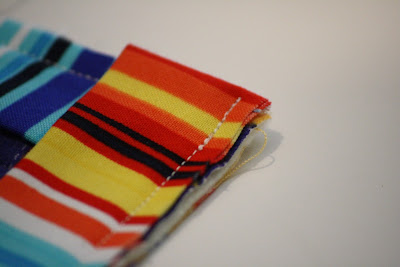
After you sew all of your strips together, fold the fabric in half wrong sides together and iron it. Iron the entire length of the strips, the whole darn thing.
You've just made your own binding!
Attaching the Binding
Now let's get that binding sewn onto the quilt and get this finished!
First thing you'll want to do is make sure you not only have enough binding, but that you don't lay it out to where a seam will fall on a corner. Pick a spot somewhere along the side of the quilt to start. Don't start on a corner, start somewhere about halfway. Leaving a tail that's at least 12" long, pin the binding to the quilt to where the cut edge matches with the cut edge of the quilt and the folded edge is facing the center of the quilt.
Continue running the binding along the length of the quilt. When you get to a corner fold the binding strip up
And then down
The goal is to not have this happen
If a seam does fall on the corner, just go back to where you first pinned it down and move it over a bit to get that seam off of the corner. It really adds too much bulk and makes it difficult to miter the corner.
Once you have your starting point set, start sewing it on. Everything I have ever seen mentions sewing the binding onto the front and then hand-stitching it onto the back. I sewed my binding onto the back first and have on more than one occasion. When do I do this? When the fabric on the back is a difficult one to hand sew through! I've used a fuzzy fleece before and have flannel on this one. I'd rather hand sew through the plain cotton thankyouverymuch.
You can pin the entire binding down before you start sewing or just feed it through the machine as you sew, whichever is easiest for you. I usually have the quilt off to my left and the binding off to my right and just feed them through together.
You can pin the entire binding down before you start sewing or just feed it through the machine as you sew, whichever is easiest for you. I usually have the quilt off to my left and the binding off to my right and just feed them through together.
Using a 1/4" seam, begin sewing the binding down. Please excuse my wonky seam, the quilt sort of slipped out of my hands a bit when I started sewing, oops!
When you get to a corner, sew until you get to 1/4" from the end, then backstitch and take the quilt out of the machine.
Just like you did when you measured your binding, flip the tail piece up
And then down, and pin it in place
Put it back in your machine like so:
Begin stitching and then backstitch to the edge of the fabric. Be careful not to go too far or the feed dogs may have trouble picking it back up.
Now continue sewing the binding on, all the way around the quilt. Do not sew all the way to the gap you left at the beginning. You will want to leave a tail at this end too, at least 12" long.
Now line those tails up along the edge of the quilt, leaving a 1/2" gap between them
Measuring from the gap, trim the ends of the binding so that they are 1 1/4" long. (This measurement should be 1/2 of the width of your binding, we cut 2 1/2" strips so we'll trim to 1 1/4". If your binding is not 2 1/2" for whatever reason then you need to adjust your math for the width of your binding).
Now this is where things can get confusing. I took all the pictures and did the sewing and had it all ready, only to realize I had my pieces twisted and couldn't use the pictures I took. SO, I fixed mine and then took new pictures using scrap pieces. I hope you can understand with the scraps!
You have your two tail pieces of binding just hanging there off of your quilt. This is how you will need to open up the piece on the left.
This is how you need to open up the piece on the right.
Lay the piece on the right on top of the piece on the left as pictured. As you are doing this you will have to bunch the quilt together to help make the ends of those tails meet.
You will need to sew a seam across the corners where the pencil is laying
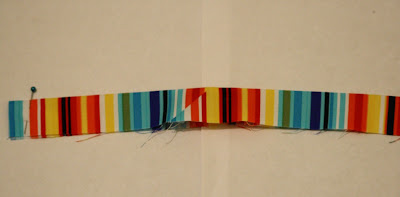
Open up the strips to make sure your newly created seam is right. You want it to not only be the same length as the unfinished portion of your quilt, but you don't want those strips to be twisted like mine were.
Once you confirm that your binding is done right, trim of the excess fabric using a 1/4" measurement from the seam.
Stitch the rest of the binding down, this is how it should look on your quilt after it's done.
Sewing the binding onto the front
I always hand sew the binding onto the front using a ladder stitch. I like how the stitches end up hidden that way. If you prefer to machine sew yours on, by all means go for it! I've never done it that way so I don't know exactly how to do it and would have to wing it if I did. What I would do though is pin the binding down, all of it. Then use whatever foot works best to get that stitch close to the edge of the binding. Then just take it slow!
I had some trouble getting good pictures for this step. I dropped my camera and broke the lens that was able to get extreme close ups and have yet to replace it. I have been using a 70mm lens with a macro setting on a tripod this whole time! I got the best pics I could get with what I had to work with. I will link to a tutorial at the end of this post for the type of stitch I use for just in case. She has some good close up pictures. That way if mine is unclear you can look at hers and hopefully be able to figure it out between the two.
First thing to do is tie a knot into the side of the quilt under the binding. There are actually two knots in the picture because I had already started sewing and this is where I ran out of thread.
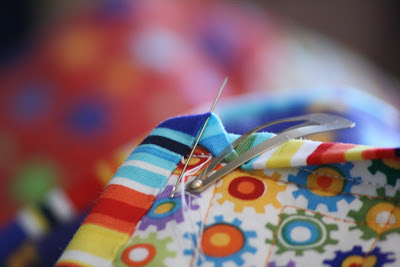
Then put the needle through the binding to where it will come out of the crease. It's a little difficult to see in this pic, but the needle is coming out right under the thread there.
Then feed the needle through the fabric right next to the binding like pictured. You want the needle to enter the fabric next to where it came out of the binding
Now feed the needle through the binding the same way. Have the needle enter next to where it came out of the fabric
Keep repeating these steps, your stitches will look like a ladder
When you pull them tight, they disappear!
If it helps while you are sewing you can pin the binding down. I like to use hair clips though, they don't poke me in the fingers.
Now when you get to the corner, don't panic! Just continue stitching all the way up
Now I'm going to show you what works best for me to tack the corners down. If you have a different way, then go for it. First thing I do is put the needle through the corner of the piece that will fold down
When it folds down the thread will be coming out of the corner like this
Then I put the needle through the quilt and then through the binding and have it come out of the crease
The next pics are a little fuzzy, sorry! Stitch the corner piece with the same stitch you've been using to sew the binding down, it will look like this
When it's pulled tight it should look like this
Use the same stitch to go back down and have your needle come back out through that corner piece
Then just continue to stitch the binding down. Do all of your corners this way. Hopefully you don't have any seams on any of the corners, if you do this part will be more difficult.
And that's it! Once you stitch it all the way down you're done!! Can you believe it?! Oh, and as promised, the link to the other tutorial for the ladder stitch courtesy of Craft Apple and Stardust Shoes.
I'm going to go finish sewing my binding now. I was hoping to have it finished for a certain little boy's birthday yesterday. He's been waiting so patiently I'm sure he won't mind it being one day late :)
As always, if you have any questions the discussion group is located here.
Thanks for joining us, I hope you had a great time! Now show me some pictures of some quilts!!













0 comments:
Post a Comment