Ready to lay it out?
Ok, here we go!
We're going to do some more cutting first.
Grab your solid and cut out six 3.5" squares
Then slice them in half diagonally
You'll end up with 12 triangles
Now, grab two of your half blocks, two triangles and one of your full blocks
Lay them out like so
Do you see the two triangles on the end?
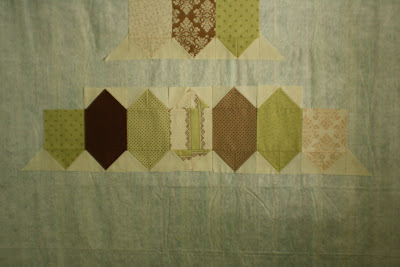
Then take 5 full blocks, two half blocks and two triangles, and lay them out like this
Note the position of the two triangles and how the three middle blocks are going to line up with the three blocks from the first row (pictured above the row)
The next few pictures aren't going to be the best, and the rows are laid out on a diagonal because my design wall isn't wide enough, so bear with me.
For the third row you need 9 full blocks, 2 half blocks and 2 triangles. Note the layout of the triangles
The next row will use the same amount of blocks, 9 full ones, 2 half and 2 triangles. Look at the half blocks and the triangles in this one though, they are reversed and at the TOP, not the bottom
Here are the two middle rows together
See how the triangles are going to make a full square at the ends?
For row 5, you will do it exactly like row 2, except the half blocks and triangles will be reversed again
And row 6, same as row 1 but reversed
Here are rows 5 and 6 together
Go ahead and sew the rows together after you have a layout that you like. Take special note of how the rows line up, particularly row 2 with 3 and row 4 with 5.
And I do apologize that some of my prints blend right into my design wall. I hope you can see them ok.
When sewing the blocks together make sure you line up the seams between the 6" block and your HSTs
And then match the points when sewing rows together. I like to pin right before and right after each one
For your triangles, easy peasy. Match the triangle up
Then flip it onto the block, pin it and sew
Next step is going to be trimming the top to make it a square. I'm going to do mine after I quilt it. You have the option of quilting yours first, or trimming it first and then quilting it, only to trim it again.
If you want to quilt yours first go ahead, mine will be quilted before I show how to trim it down. Just letting you know so you can get a jump start if you want to :)


0 comments:
Post a Comment