Friday, September 30, 2011

A Charming Winner

Via Random.Org, the winner of the Charm Bracelet from Cherry Creationz is....


Cheree @ The Morning Latte said... 3

Liked them on facebook.

Congratulations, Cheree!!

Email me at DistantPickles@yahoo.com with your address so I can ship you your prize!

Today's the Last Day!

Hey Cauldron Crafters -

Don't forget! Today's the last day to link up to win the Fat Quarter Bundle from Riley Blake Designs over at Fabric Donkey. Add your link here: http://www.fabricdonkey.com/cauldron-crafts/

It's also the last day to enter for the charm bracelet giveaway: http://distantpickles.blogspot.com/2011/09/charming-giveaway.html

Thursday, September 29, 2011

Easy Treat Jars (Tutorial)

Welcome Back Cauldron Crafters!

Today, we're going to create easy treat jars from recycled glass sauce jars.

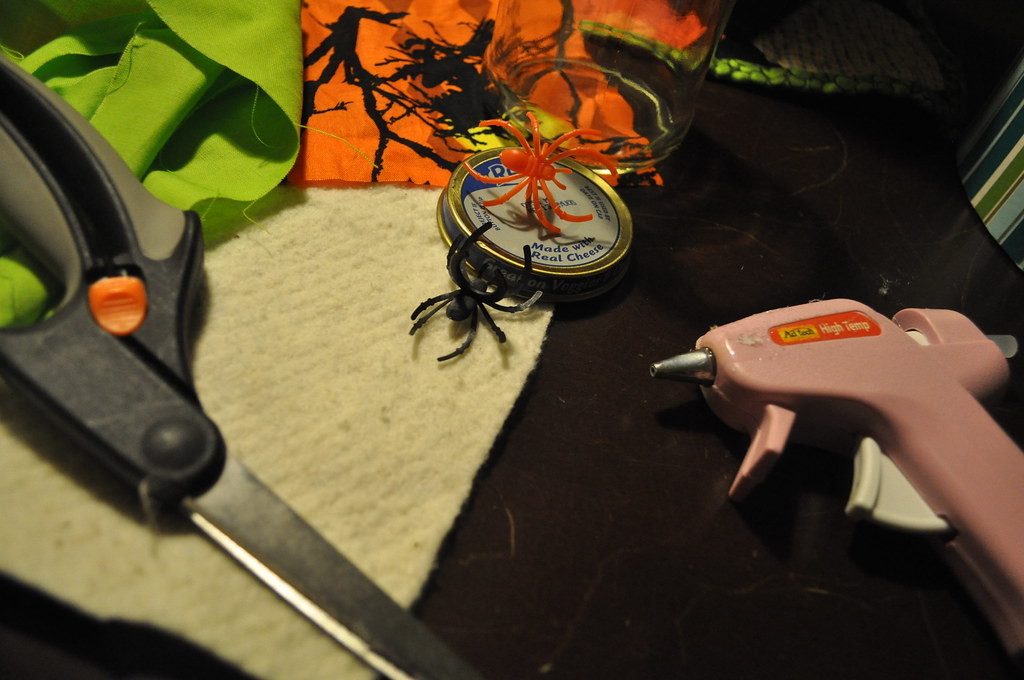
Supplies Needed:


A glass sauce jar with a lid (or as many as you want!)
A 2" strip of fabric (or ribbon or twine, if you prefer)
Fabric scrap about 7' square
Small scrap of batting
Hot glue gun
A spider ring (I got a whole bunch at the dollar store)

Remove your label from your glass sauce jar and set aside. It's hard to get all the gunk off, but since these will be filled with candy and treats, I just put the gunky side to the wall and never even notice it ;)

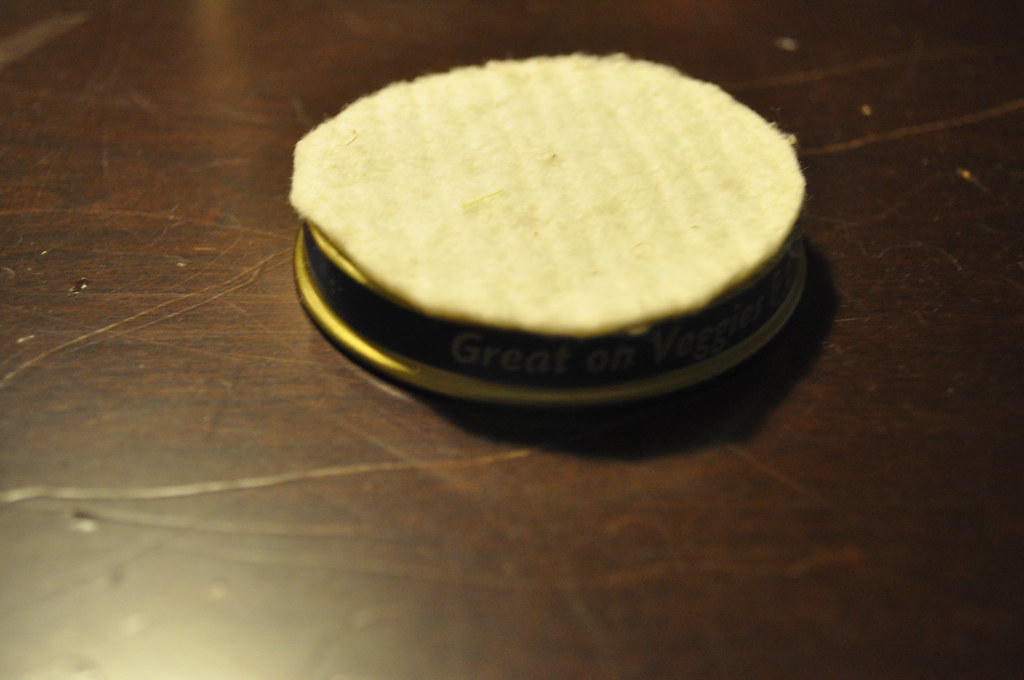
Now, take the lid to your jar, and cut a circle out of your batting that is the same size. Don't worry about perfect edges - they just plain ol' don't show! Use a few dots of hot glue to attach it to the lid.

(Like my scratched up table? Yeah, me too!)


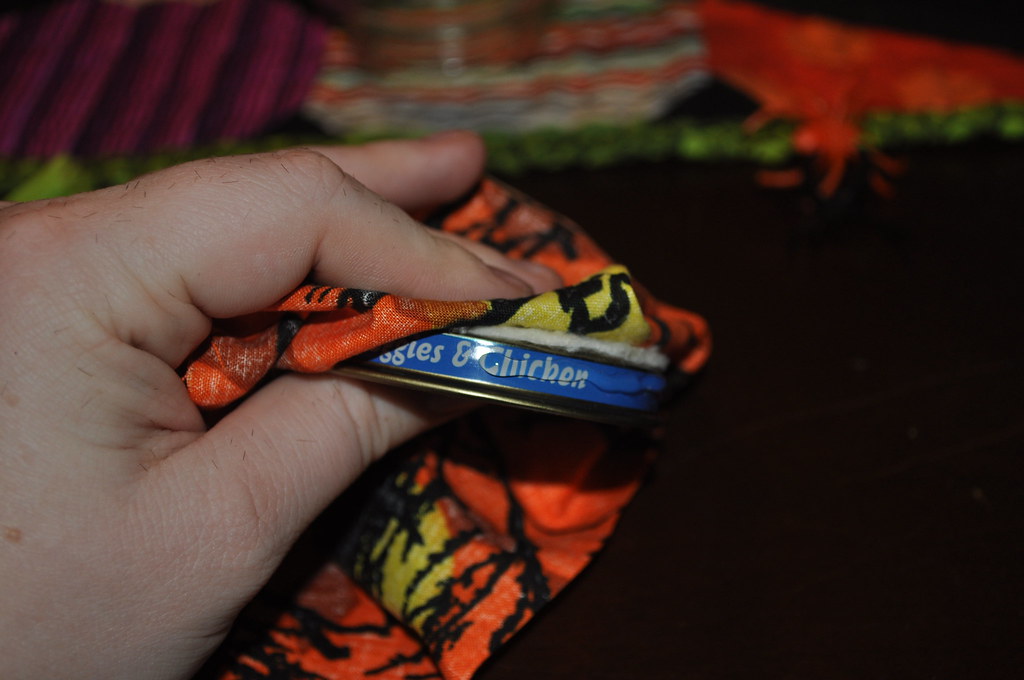
Now, lay out your fabric scrap on top of the jar lid and center it. Hold the center down as shown in the photo, and start applying hot glue to the edge of the jar lid a little at a time. I like to do about an inch, and then smooth the fabric down over it, then another inch of glue,  and so on...


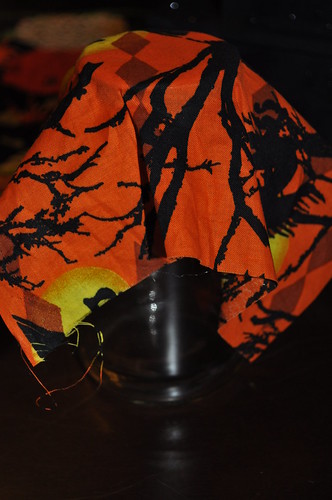
Once you have your fabric fully applied to the edge of your jar, place the lid back on the jar. It just makes this next step a little easier because you won't be trying to twist fabric and hold a little lid at the same time as applying glue!


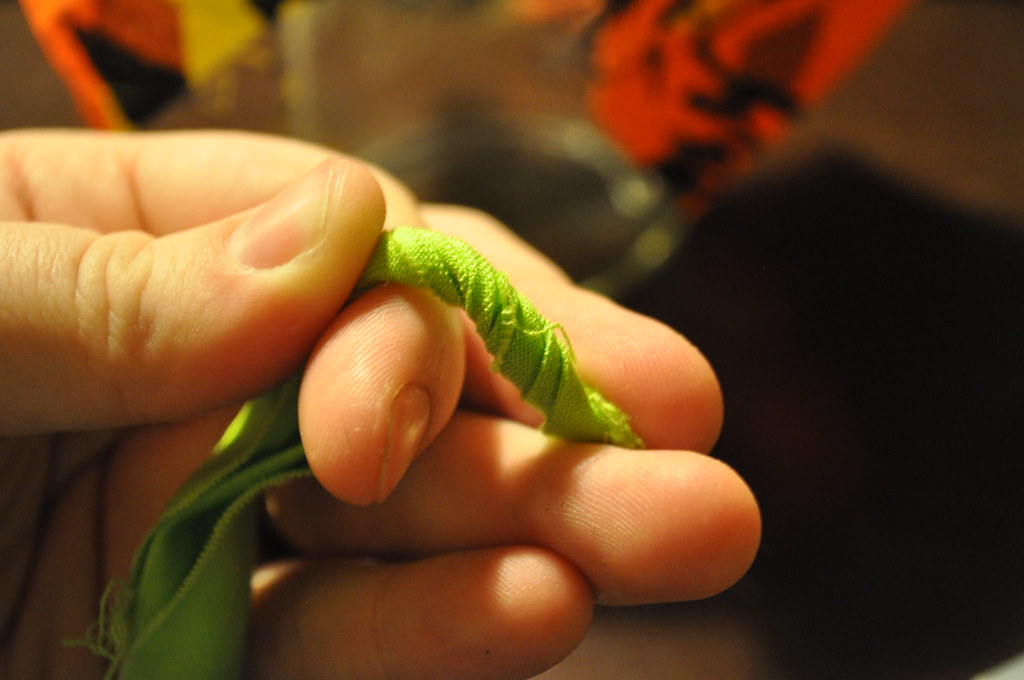
Take your 2" strip of fabric, and twist it like so:


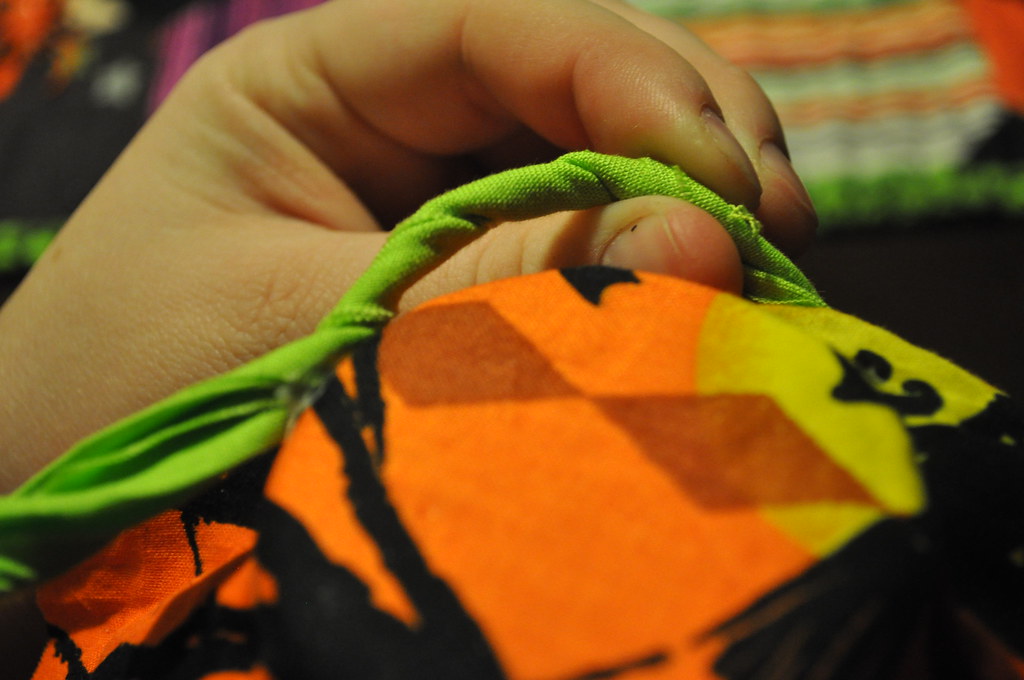
Using one small dot of hot glue, apply the twisted fabric to the edge of your jar. This is just your starting point and helps to secure it. Make sure you have a tail of an inch or two before the dot - this won't be glued down.

Now, continue twisting your fabric a bit at a time, and using the same gluing method as you used to put the fabric on the jar, start adding the twisted strip around the outside edge of the lid. The twisted fabric naturally curves a bit, so just add glue as you go, and hold it down for a few seconds until it sets:


Once you've got your twisted fabric applied to the jar lid, and you're back at your starting point, trim any excess so you have an equal tail to the one you left at the beginning - about 1-2".

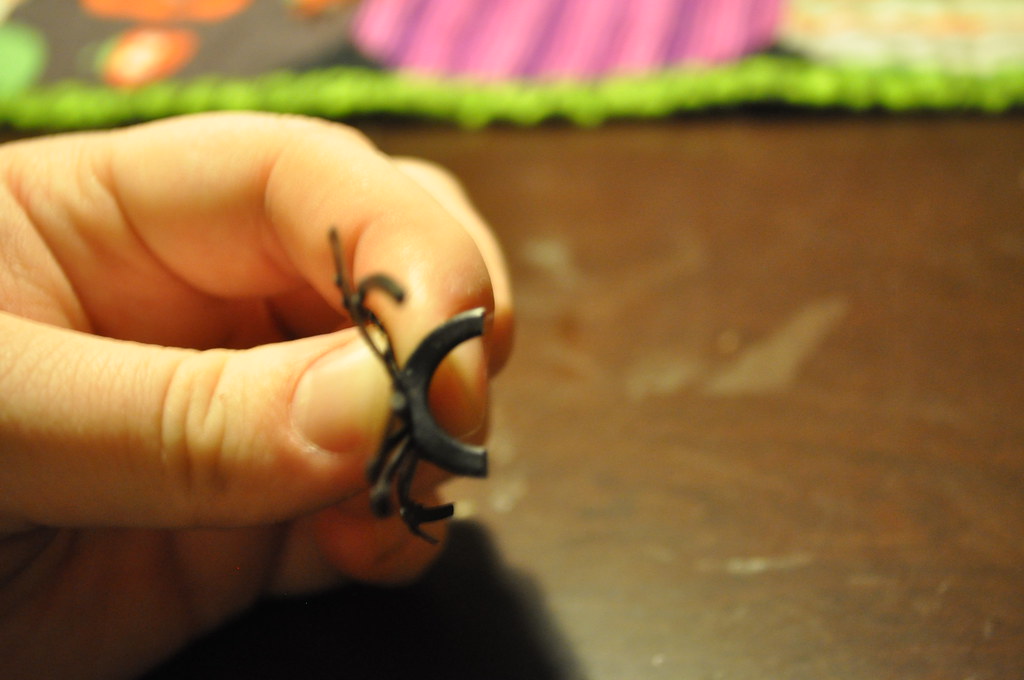
Now, take that plastic spider ring, and chop off the edges of the ring as shown. You still want a little of the ring part, but not the whole thing:


A quick dot of hot glue right on top of the twisted fabric, in the place where the starting and ending point meet, and press that little spider right into place.

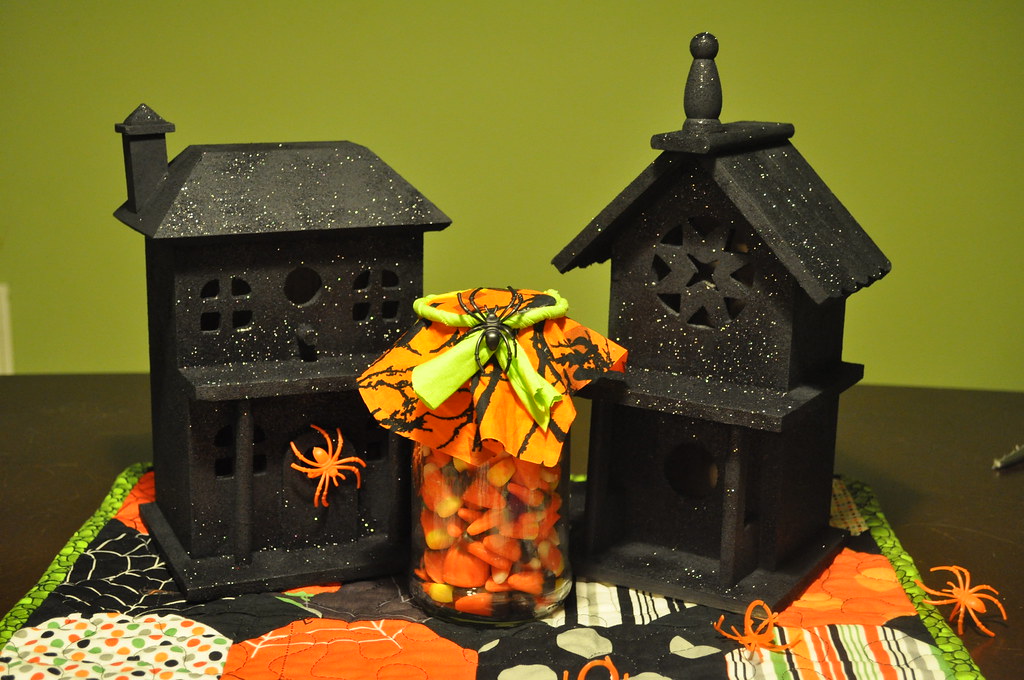
Trim up your excess fabric to a shape that's pleasing, and fill with your favorite treat:

(Mmm, Candy Corn. Or as Kid calls 'em: "Orange Triangles"
Cuz... well, you know, Candy Corn is just too hard to say!)


Easy enough, right? Don't forget to add your photos to the Flickr Group and Link Up to the Fabric Donkey page for a chance to win the Fat Quarter Bundle from Riley Blake Designs!


Wednesday, September 28, 2011

Creating a Wonky House Quilt Block

Hey, Cauldron Crafters!

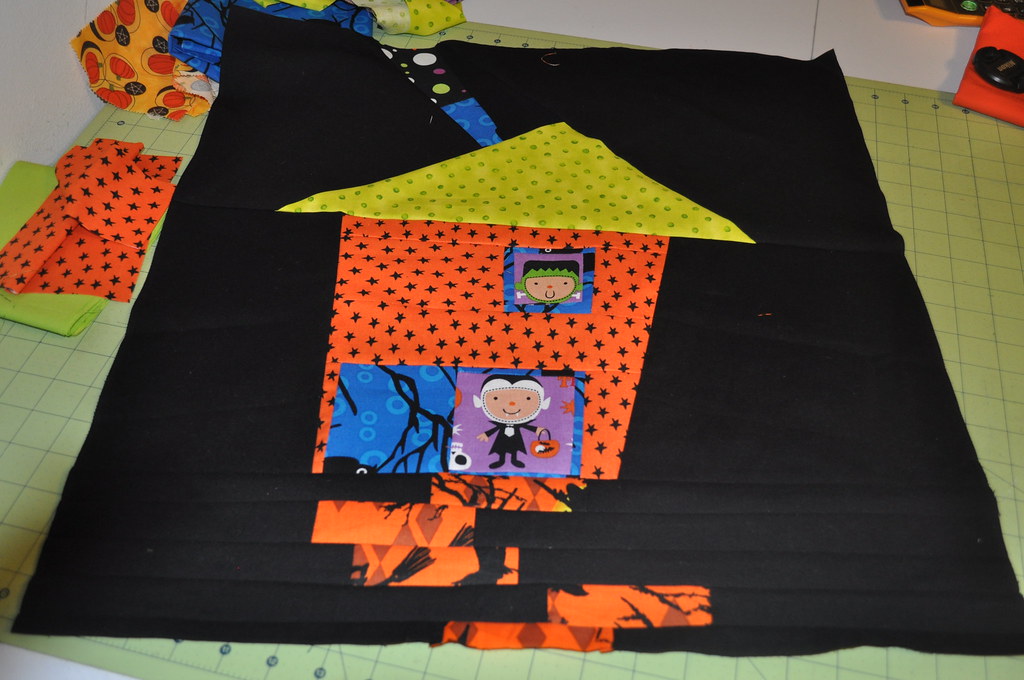
Remember my Haunted House Quilt? I've had a few questions on how to create a wonky house block, so I've taken a few photos of an extra block that was made into a pillow for y'all. Remember, I loosely followed the instructions from UnRuly Quilting, but I've wonked my block a bit more, so I'll show you how to add the little characters and so on.

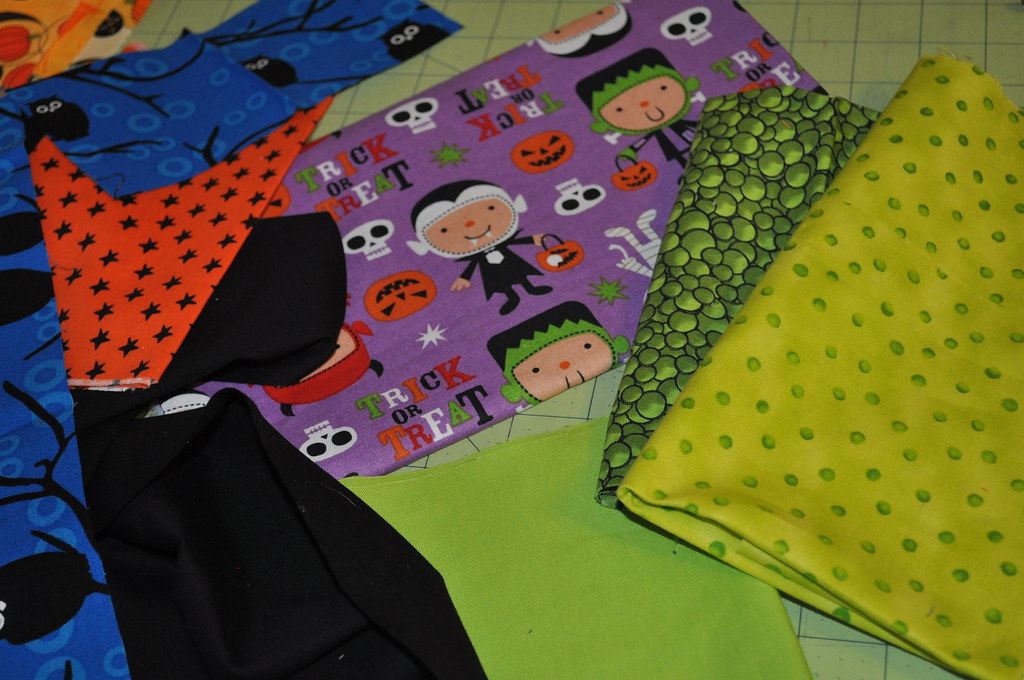
First, we're going to need scraps. Fussy cut yourself some characters if you'd like them to appear in your door and window - I've used both Riley Blake's Boo to You Scatter print and the purple print below, found at Joann Fabrics:


You'll also need various other cuts of fabric - nothing more than a fat quarter - and a bit of background fabric. For my 12.5" blocks for the quilt, I used about 8-10" WOF of background fabric.
This block creates a TON of waste, so you really have to commit to the look and prepare yourself for exactly how much fabric goes into one little block. 

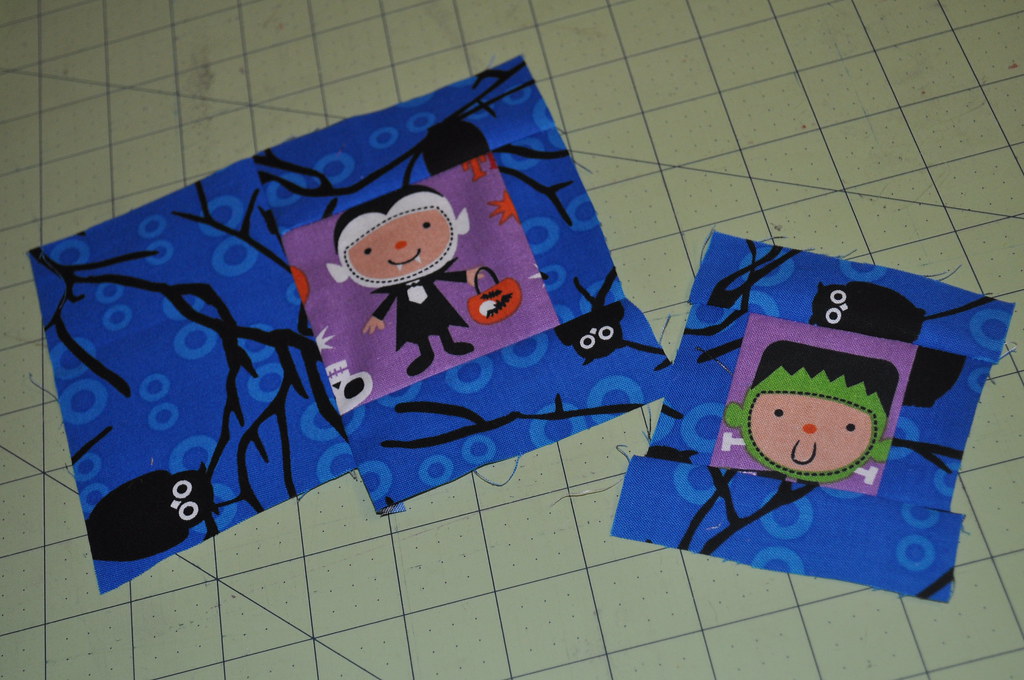
We're going to take our fussy cut little characters and add some frames around them. To do this, I usually use scraps from other projects, but if you're cutting from a fat quarter, cut your strips to be at least 1.5" wide each to start. You'll lose a half inch in each seam allowance.
Add the frames around each side of the character square as shown. If you're choosing to have the open-door look shown, make sure your door piece is to one side, and it is at least as wide as the character cut:


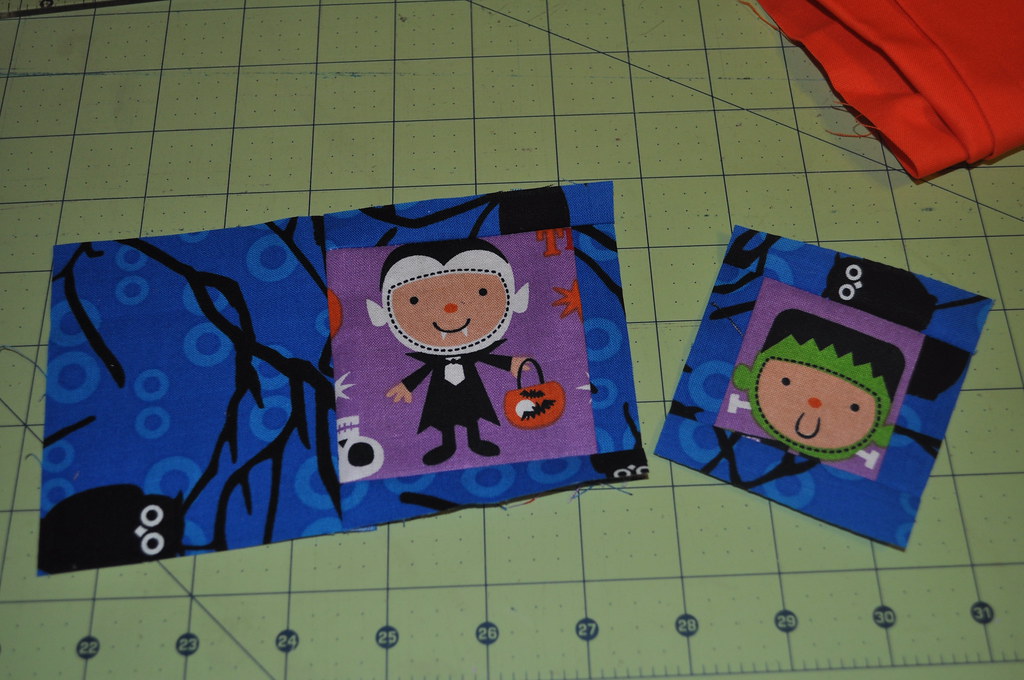
Square up as shown.. you can choose to make this part a little more wonky by cutting at angles. Mine are slightly wonky:


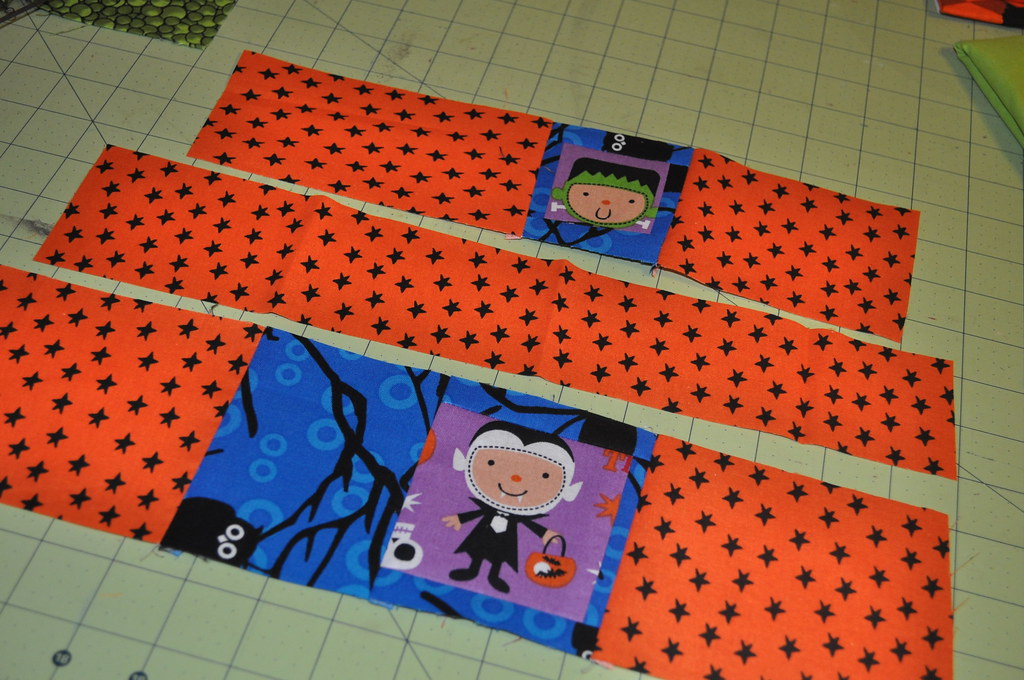
Now, we need some house around these guys! Cut yourself some strips of your house fabric, and add one strip to each of the sides of your little guys. Cut another strip to add some distance between them. What, you want measurements? Ha. What are those?! Just kidding. I cut my middle strip to be about 14" on this one, because my block needed to be 21" square for my giant pillows. It's okay if your strips are a little longer or shorter than each other - just so long as they're tall enough to meet the height of our fun guys!


Trim up any funky edges- you want your strips to all be even. They can be "uneven", in the manner that they'll be wonky, but you want the edges of the orange and the door/window to match up with each other. Make sense?
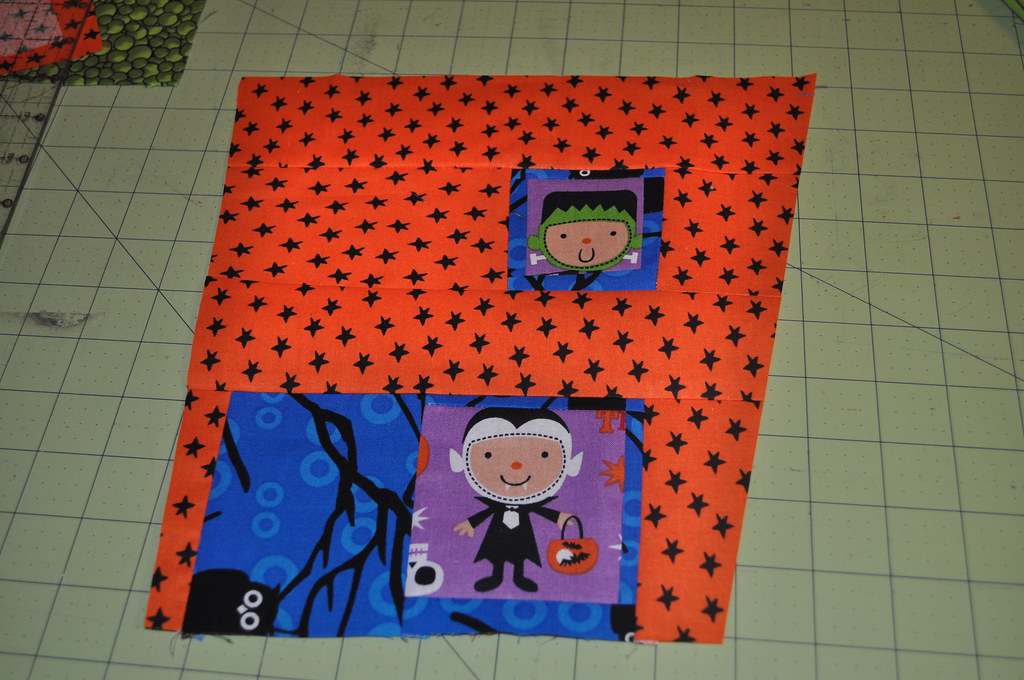
Now stitch your three sections together to form your house, and trim as desired:

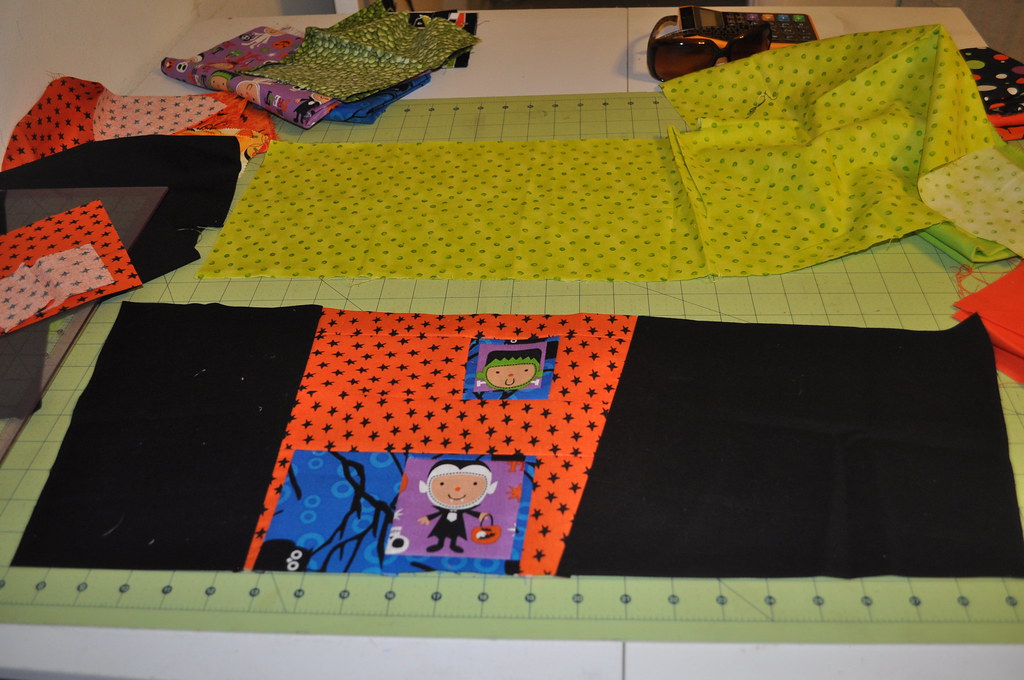
Now, we're going to add pieces of our background fabric to each side of the house. Size, again, is dependant on your project and how big you want your block to be. Make sure you've got an extra few inches in width - you're going to wind up trimming things down and you don't want it to be too skinny!


To add your roof, cut a rough triangle that is wider than your house by at least 2". You want it to overhang a little bit. We need to add the background fabric to this before we add it to the house - think of it as two separate blocks that you'll join together later on.

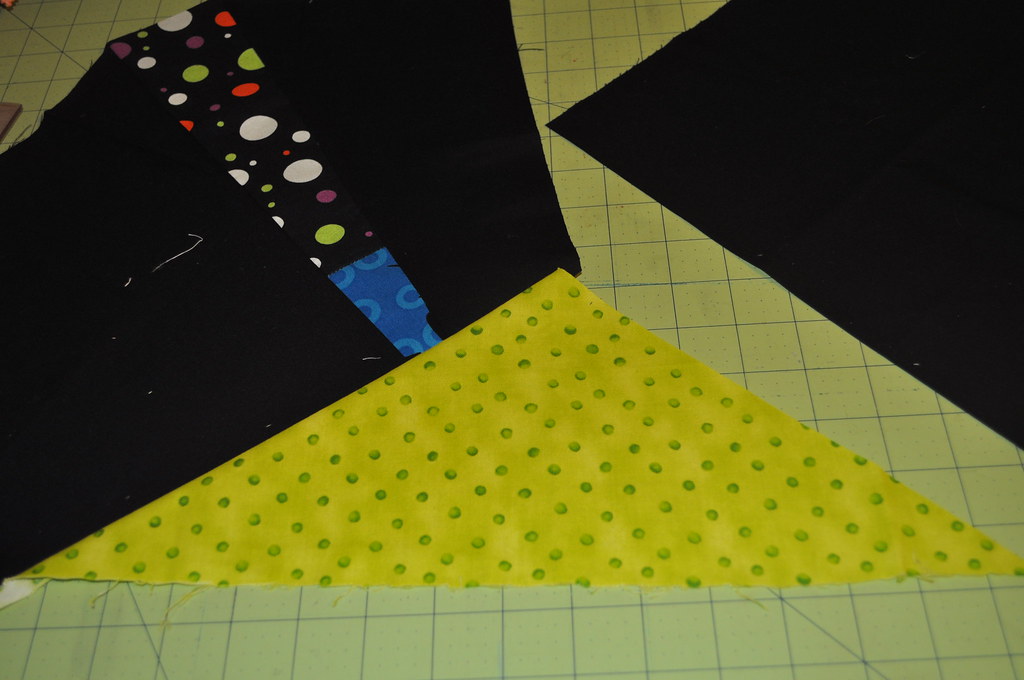
This part is where the most waste occurs for me. You need to create a large enough piece to make your block big enough, which means a long and wide piece. You'll be adding it to the slope of the roof like so:


If you choose to add a chimney, add it between two chunks of the black, before adding it to the roof triangle.

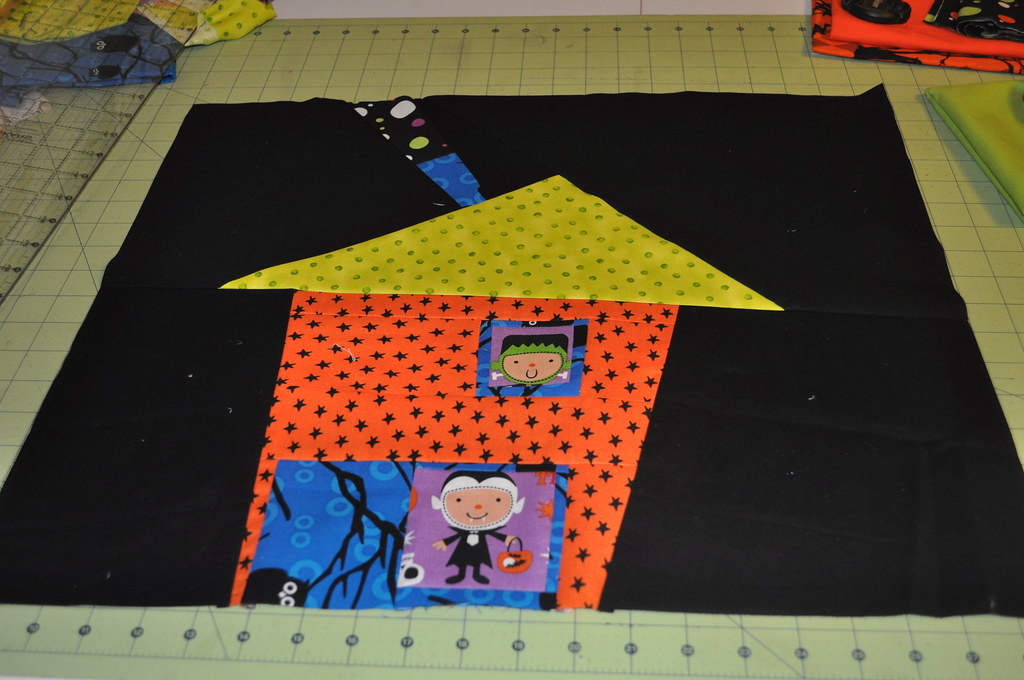
Using the other side of the roof as your guideline, trim the excess background fabric off so that you have an even edge to add the other half of the background fabric to. Stitch together, trim the bottom, and add to the house section as shown:


Now, you can stop here, or you can add spooky steps! To add spooky steps leading to the door, cut 1.5" strips out of a print and 1.5" strips out of the background fabric. Join together on the short end, and stagger their placement, stitching to the bottom of the block one at a time:


And MAGIC! We have a wonky house block. You can choose to make this more wonky if you so desire - the wonkiness is entirely up to you. Keep in mind that the sharper the angles, the more waste you'll have.

Lather, rinse, and repeat as many times as you want to make a quilt top, or quilt as is and create a Wonky Haunted House Pillow Cover!

Don't forget to link up any projects you've created over at Fabric Donkey for a chance to win the Riley Blake Trick or Treat Fat Quarter Bundle and add them to the Flickr Group!


Oh, finally, a little wonk!

WIP Wednesday-September 28 (How's that for a creative title?)


It's been pretty hit and miss in the crafting department lately. I have a new found obsession with running, which was taking a lot of my energy, only to end up with a knee injury 2 weeks into my Couch to 5K training. I've been nursing it, willing it to get better, but sadly it's left me in a rather depressed state.  I finally got up the motivation to get off of this couch and do something about the state of my health, only to get slapped down. I'm trying to gain a better outlook about it all though and with the help of some super awesome friends I've been getting better day by day. 

So here's what I've managed to accomplish in the few weeks since my last post. Not as much as my last post, but still something, so I guess that's good right?

Bee Blocks

Here are my 12 month bee blocks for September, for Alix. She requested a block in block pattern with the inner block offset. She sent some scrumptious Central Park fabrics, which you all know I adore. 

September Bee Blocks for Alix


Farmer's Wife Quilt Along

No progress here.

Double Wedding Ring Quilt Along

No progress on this one either.

For the Love of Solids Swap

All done! And I'm very happy to say that my partner, Leona, loves what I sent her! At least I hope she did, there were a lot of exclamation marks in her thank you note, LOL!

Leona said one of her favorite color combinations was red, white, grey and aqua. She also said she likes rainbows, but I didn't find that out until after I started the big project. 

So I made a wall hanging out of her favorite colors combinations...


....which I wish I hadn't washed. I'm just so used to throwing quilts in the washer as soon as they're done! LOL

And since she likes rainbows, I made a rainbow pouch


I tried out handquilting for the first time! 


and a rainbow mug rug


Why didn't I hand stitch it closed? Don't you hate when you wish you had done something different AFTER you've sent it off?

Color Wheel Charm Swap

Because I love rainbows too, I signed up for the color wheel charm swap. My colors were violet and violet purple. I had to buy one yard of each and cut them each into 56 charms and then send them to Kati. She then separated them all and mailed them back out to all of the 56 participants. I got my charms last week and am IN LOVE.

How's this for a stack of rainbow goodness?


I've been dying to make a paintbox quilt, I think I'll put them towards that. 


Bree's Donation Quilt

Here's the one I forgot to get pictures of last time. Bree sent me a kit, everything included to make an entire tumbler quilt, for her Quilts for the Kids donation drive. It took me awhile but I finally got it done. Her delivery deadline is in December so I knew I could take my time. It was a quick and easy project once I got to it though, it's nice having everything pre-cut and ready to go!


I echo quilted the seams on this one, it was fast and easy and fun!


Sorry about that stray thread in that picture there, oops!


Lollipop Bento Box

It's done, finally! I first blogged about this one back in December! Man, I can't believe how long it sat in my WIP pile. 


I quilted a spiral into each of the blocks, echoing the seam lines again. There was a whole lot of twisting and turning involved, and some mighty sore shoulders, but I do like the look it gives to the finished design.


Now I can't decide what to do with it. I could hold onto it for a baby gift (It's only 48" square) or I could list it in my etsy shop. I'm leaning towards listing it and seeing if I can make a little extra cash. I like the idea of having a ready made baby quilt on hand, but at the same time I prefer to make a quilt with a baby specifically in mind.


I've also managed to make some serious progress on some pay it forwards gifts. I've been working hard on those so I can cross them off my list. The end of the year is inching closer and closer every day, I'm running out of time!

Items on Hold
I'm doing good keeping my vow to finish these WIPs before starting anything new, so look for a couple of these to move up the list soon.

Christmas Quilt from Christmas Bee
Little Faces quilt from 12 Month Christmas bee
Strawberry Lemonade snowball quilt
Strawberry Lemonade Ritzy Cracker quilt
Dill Blossoms hexagon quilt
Denim winter quilt


Don't forget we have two giveaways going on right now, both end on Friday.


One is for this super adorable Halloween charm bracelet, courtesy of Cherry Creationz


Follow the link below to enter:


Charm bracelet giveaway


The other is a giveaway to help pick a winner of our header contest and in honor of our 100th Post. Bree and I have been hard at work cooking up some goodies for the prizes. Here are a couple of sneak peeks


Follow this link for information on how you can enter to win!


100th Post Celebration


As always, I'm linking up with Lee

WIP Wednesday at Freshly Pieced


Happy Wednesday!


Tuesday, September 27, 2011

Awesomely Fun Popcorn Balls


Hey guys, Julie here! I actually have a contribution to Cauldron Crafts! I know, I know, only one? It's a good one though!

I'm just not a huge Halloween fanatic. We go trick or treating and have a lot of fun with that every year, but I don't decorate or go all out making costumes or anything. So in my goal to find something to contribute, I remembered this popcorn ball recipe that I had. I made this for a Halloween party for one of my sons at school and they were a huge hit! 

Make them for your party, or to give out to trick or treaters!

I don't know about you, but I'm a total visual learner. So I'm going to show you how to make these all P-Dub style.


You will need:

For Part One:


Cereal, Skittles, Twizzlers and popcorn

A note about these ingredients....You can use whatever cereal and candy you'd like. The original recipe calls for Corn Flakes, but I had Crispix on hand. If you use Twizzlers, try to find the ones that are already cut into small pieces (I think they're called nubs or something). That way you won't have to cut your own. My store didn't have them. For the popcorn, you can use butter, but I use the plain kind for reasons which I will reveal later. Anyway, feel free to mix this up and try different combinations!

For Part 2 you will need:


Butter (or margarine), corn syrup and marshmallows (10.5 oz bag)

Grab a large bowl and throw in 1 cup of each of the cereal,  cut up Twizzlers and Skittles. 


Pop one bag of popcorn (and then pop another because you accidentally cooked the first one too long and burnt it) and pour it into a separate bowl. Now, transfer the popcorn into the bowl with the candy and cereal by hand, just grabbing handfuls at a time until it's done. By doing it this way (instead of just pouring it into the bowl straight from the bag) you will keep all of this from getting mixed into the good stuff:


At this point you can mix all of the popcorn and candies together, or just leave it alone. My biggest bowl was barely big enough to hold it all and I would have had popcorn flying if I tried to mix it. Plus, it's just going to get mixed again later, so I left it. 


Ok, set that aside for now, on to part 2.


I forgot to take a picture of this part, but you will need 1/4 cup of butter and 2 tablespoons of corn syrup. Melt them together in a large saucepan.

Once they are melted, add the entire bag of marshmallows and stir until melted. You'll have a nice bubbly mixture.


Remove the pan from the stove and pour the contents over the bowl of popcorn mix


The next few pictures were taken by my 11 year old because this is where I became a sticky mess. Before becoming a sticky mess yourself, grab a muffin pan and spray it with cooking spray.

Grab a rubber spatula or wooden spoon (something flat works best) and start mixing it all up


Now comes the fun part!

Ok, here's where I get philosophical on you. In order to not get messy, you have to get messy. Huh? I don't know how much of a secret this little step is, but it's something I figured out while making Rice Krispies Treats one day and couldn't get the treats in the pan without them sticking to everything. 

Grab a small amount of butter and spread it over the palms of your hands. You don't need a lot, there's actually too much on my hands here. You just need enough to get them a bit slippery.


Then reach into the bowl and grab a handful of your popcorn mix, and roll it into a ball.


Do you see how sticky this stuff starts out?


By putting the butter on your hands, it will keep it from sticking to you. This is also the reason why I use plain popcorn instead of buttered. You may need to add a little bit of butter back to your hands in between rolling the balls.

After you have them rolled, place them into the muffin tin to set. 

This recipe should yield 12 good sized popcorn balls.


And please don't laugh at my poor muffin pan. I bought it eleventy billion years ago when my husband and I got married. Ok, this coming Friday will actually make it 11 years ago, but it's gotten a ton of use and abuse, don't hurt it's feelings.

I hope you enjoy this recipe! It's a big hit with the kids, just ask Bug. I walked away from them for 5 minutes and found her with a bowl with three of them in it, just munching away!