
Pretty much every major store in America now offers "green" shopping bags - pressed poly/plastic totes in a decent size, with a little plastic insert to keep the shape at the bottom. They come in a variety of colors, green being the most popular, and typically have a big ol' logo right dab smack in the middle. Pfft, these people think I'm a billboard? Not so!
PRE-WARNING: Do NOT NOT NOT iron this bag. You will hate it and me and curse us both as you drive to the store for a new iron and a new bag. The poly/plastic melts like crazy and sticks to the iron. Not that I'd know...
Supplies needed:
A pre-made grocery store tote
About 3/4 yard quilter's cotton for lining
Scraps for embellishment
Hot Glue Gun
99 cents gets you one of these:
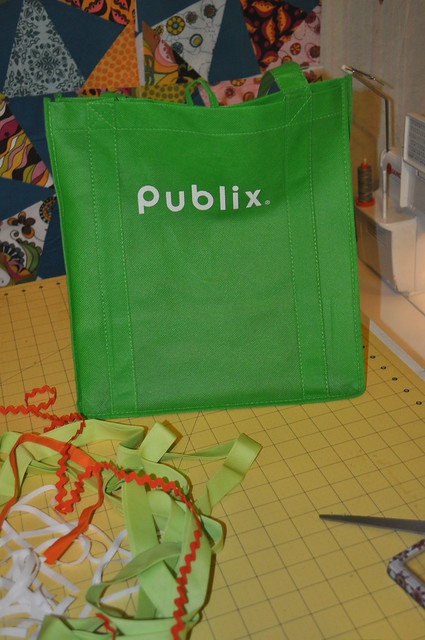
(Okay, I'm a little bit of a billboard)
Make sure yours is a festive Halloween color!
We're going to line it and embellish a bit so our kid has a cooler tote bag for his trick or treating adventure! Or, if you're kidless, you can be awesome like me and use it to tote your various things back and forth to your office.
Our first step is going to be embellishing. My bag has logos on both sides, so I need to cover both logos up.
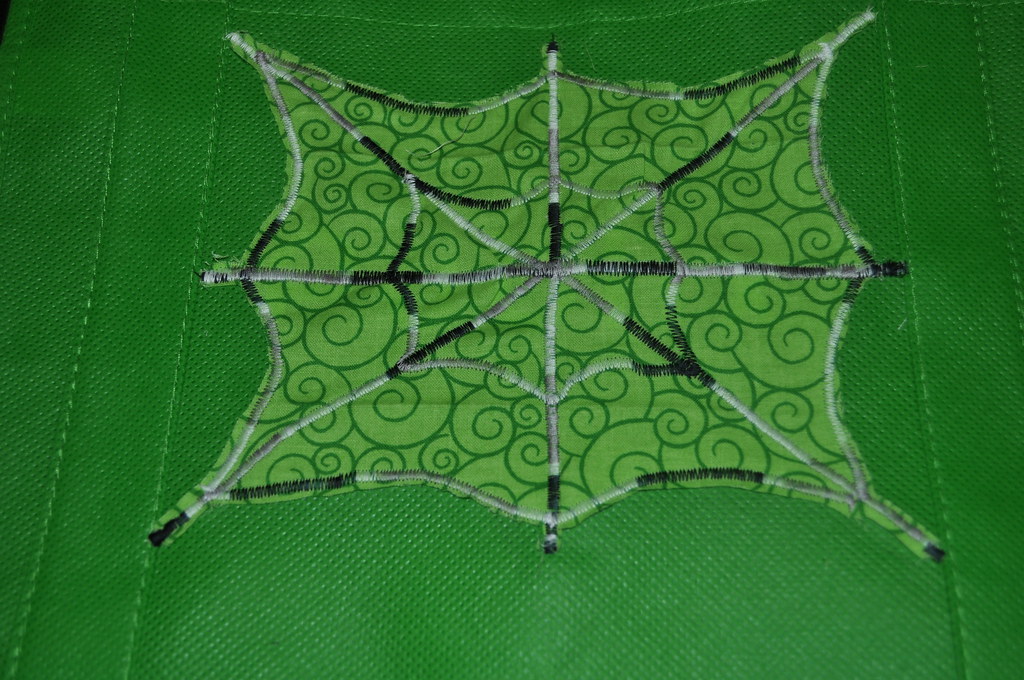
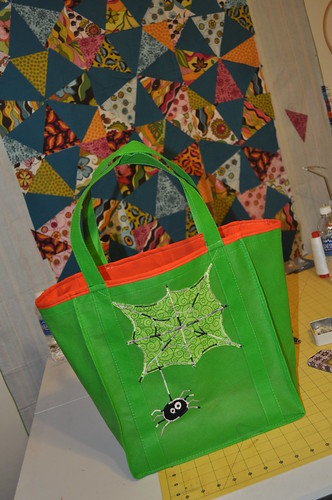
Side one is going to be a spider web with a spider. Take a scrap of fabric and stitch straight down to the front of the bag, over the logo. Be careful to avoid accidently catching the straps or other side of the bag when stitching! I used Aurifil's Zebra Variegated thread in a tight zig zag to create my basic web.
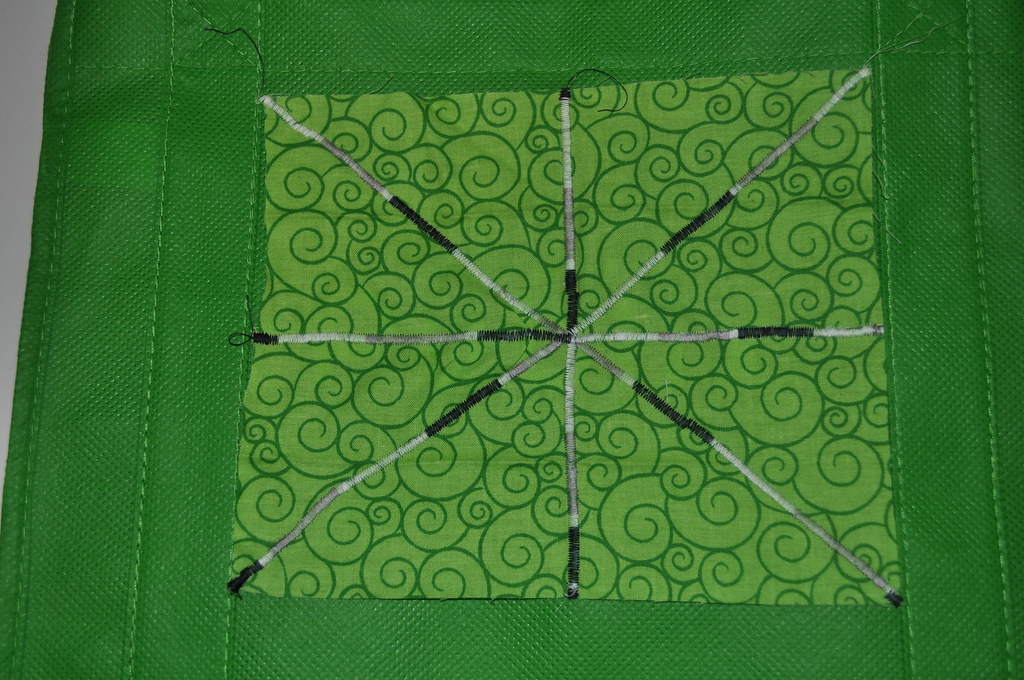
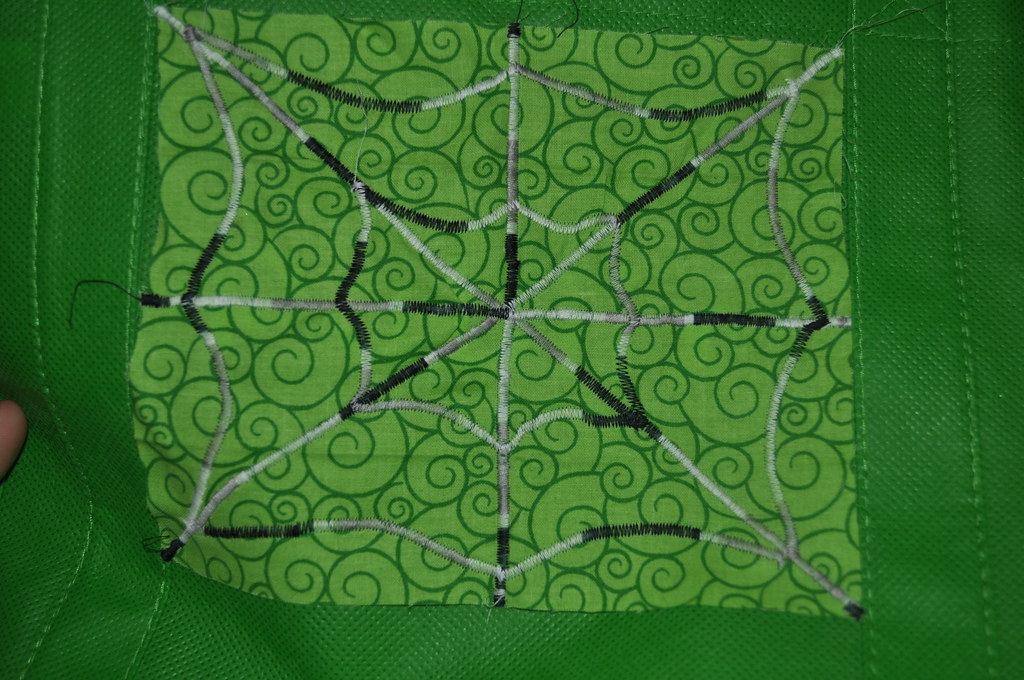
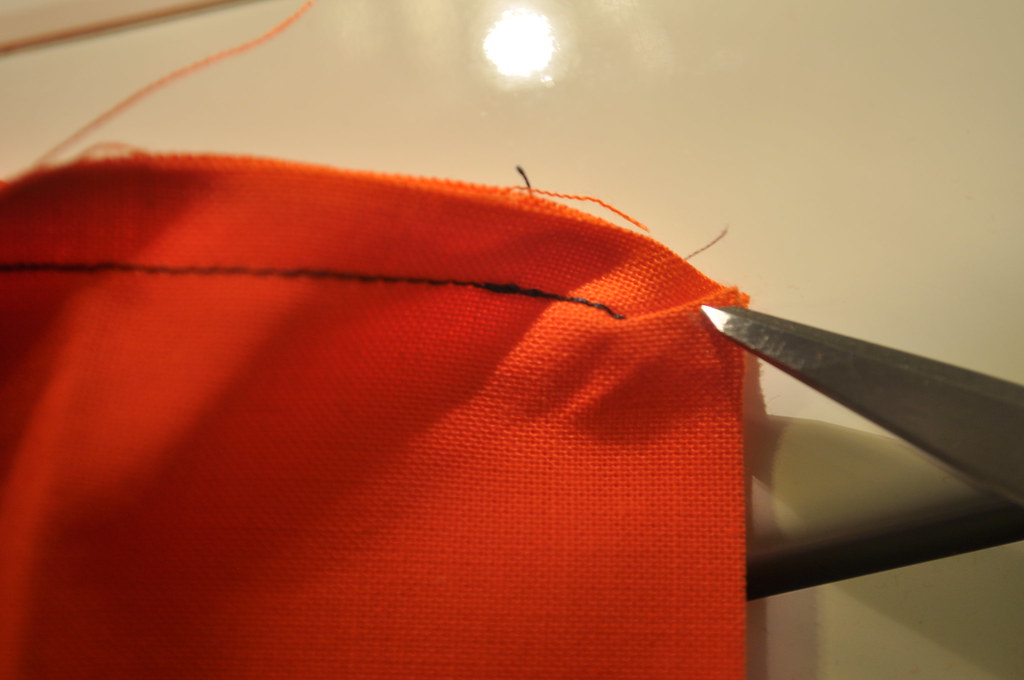
Make sure not to stitch down the outside edges of your fabric scrap - we're going to be snipping away those outside curves to give ourselves a nice spiderweb shape:

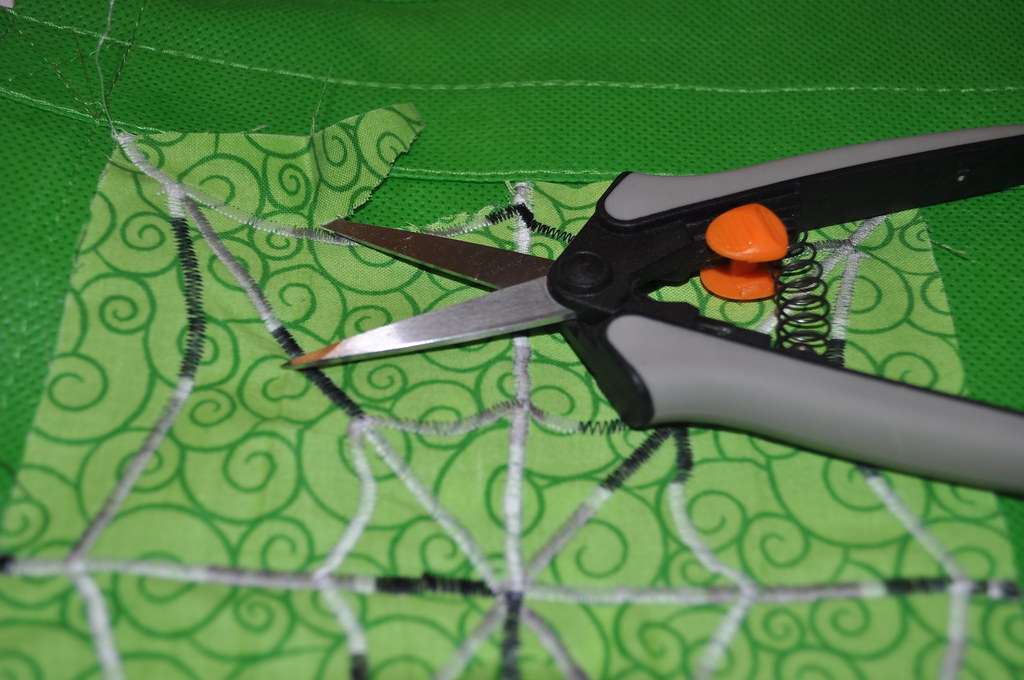
Once you've finished snipping away, you'll have this:

Grab yourself a smidgen of black fabric, and make a little spider dangling down as so:
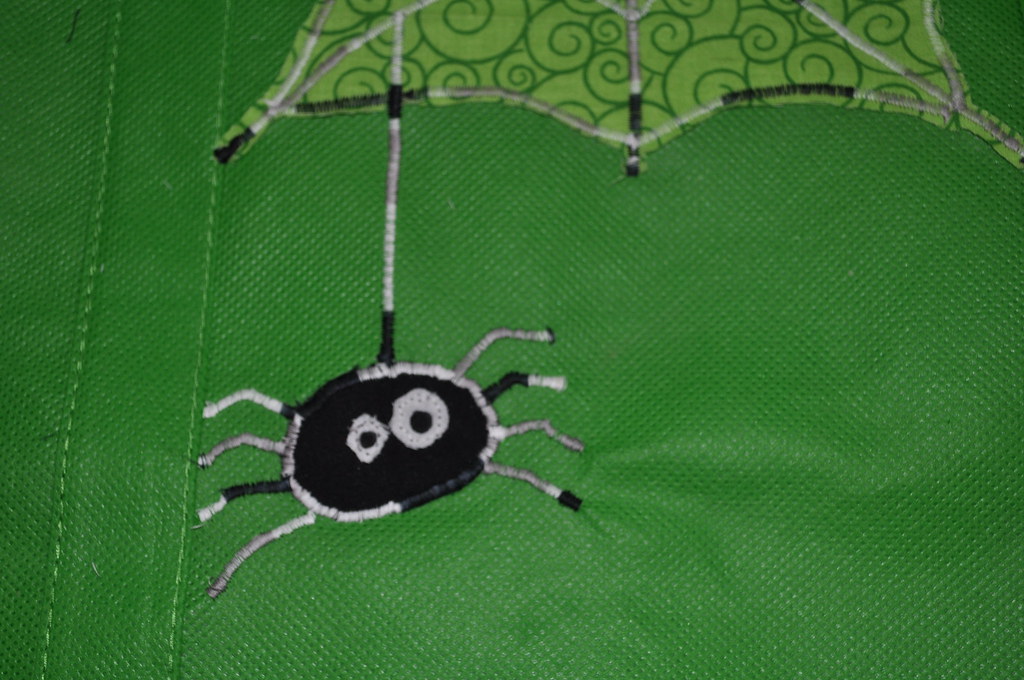
Again, with the spider, I used a tight zig zag in Aurifil's Zebra. Awesome thread!
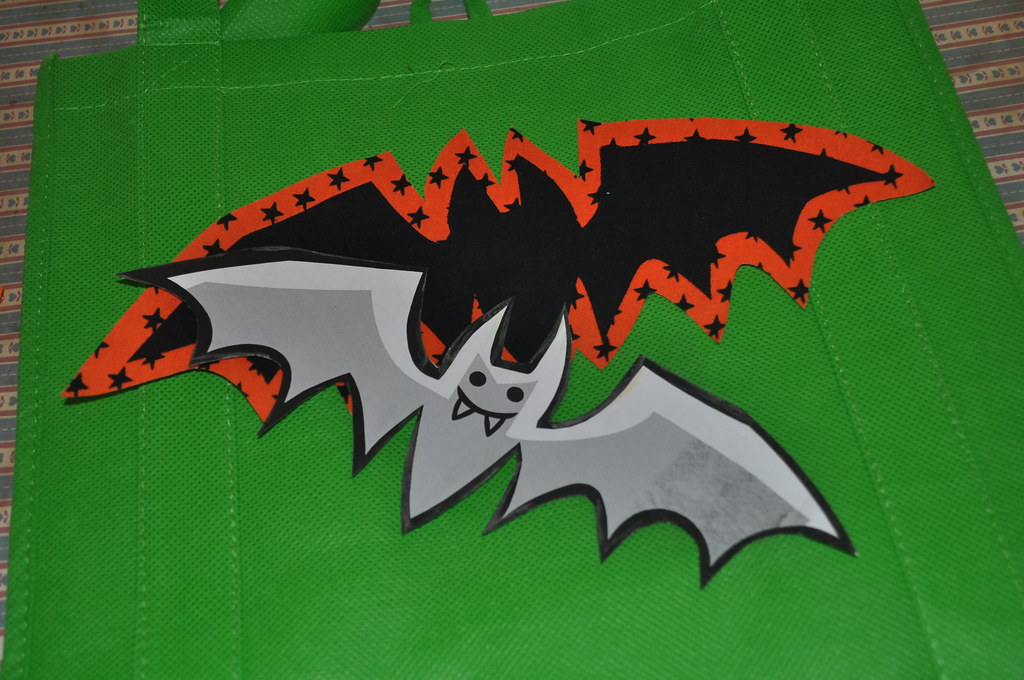
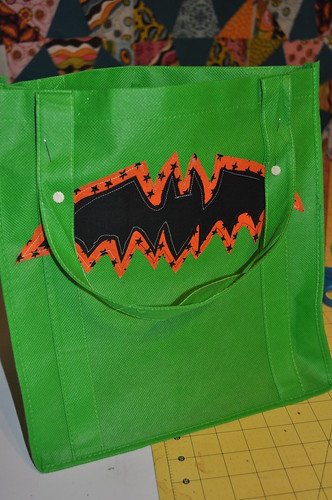
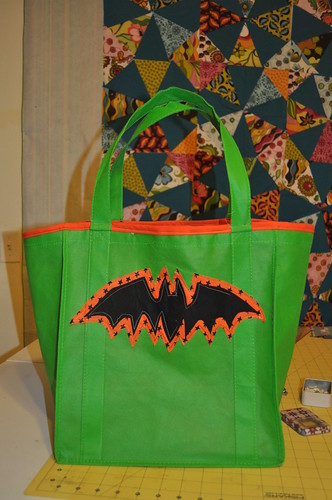
You can embellish these however you'd like - let your imagination go wild! I put a bat on the other side of mine, using a microsoft word clipart image as a template:
Now, to the lining!
Before you insert your lining, you will want to take that little hard plastic sheet that comes in the tote bag to give it the shape, insert it into your bag, and affix it to the bottom. I did this with a few dots of hot glue.
Before you insert your lining, you will want to take that little hard plastic sheet that comes in the tote bag to give it the shape, insert it into your bag, and affix it to the bottom. I did this with a few dots of hot glue.
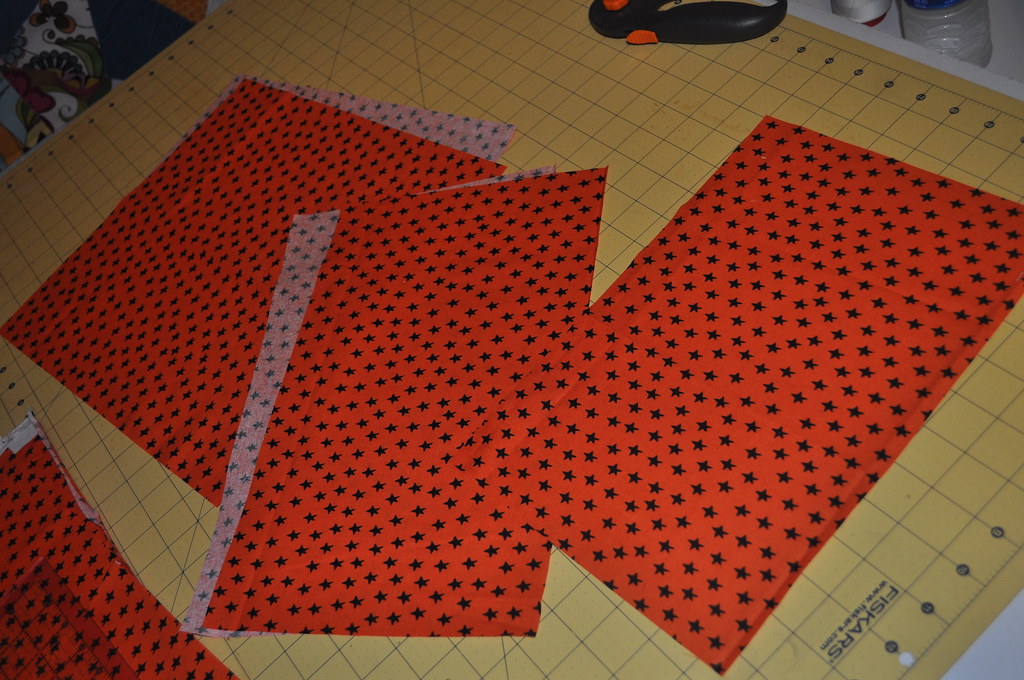
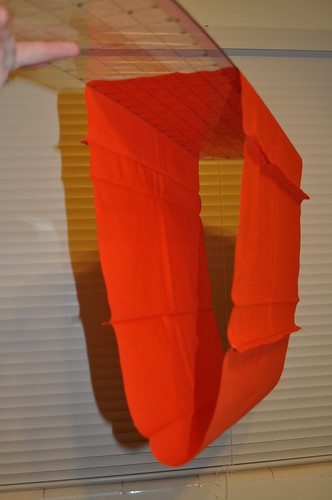
Your lining size will be determined by your exact bag. My bag measured 12" wide by 13" tall and 8" deep. I added .5" to each of these measurements for seam allowance and therefore needed to cut : two (12.5"x13.5"), two (8.5"x13.5") pieces, and one 8.5"x12.5" piece for my bottom.
Taking my two (12.5"x13.5") and two (8.5"x13.5") pieces, I stitched one 12.5" width piece to one 8.5" width piece, stitching along that 13.5" side. Repeating this for the other pair, I now have two pairs. Stitch them together - you should now be looking at a long piece that is made up of your 12.5"+8.5"+12.5"+8.5", stitched in that order. Join the last edge together to form a loop:
Take your 8.5"x12.5" (bottom) piece and mark a small dot 1/4" inside each of the four corners. This is your marking line for your seam allowance. Pin the bottom piece to one seam, making sure to match up your 8.5" side with one of the 8.5" wide panels in your loop. Pin into place, using your dot as a guide:
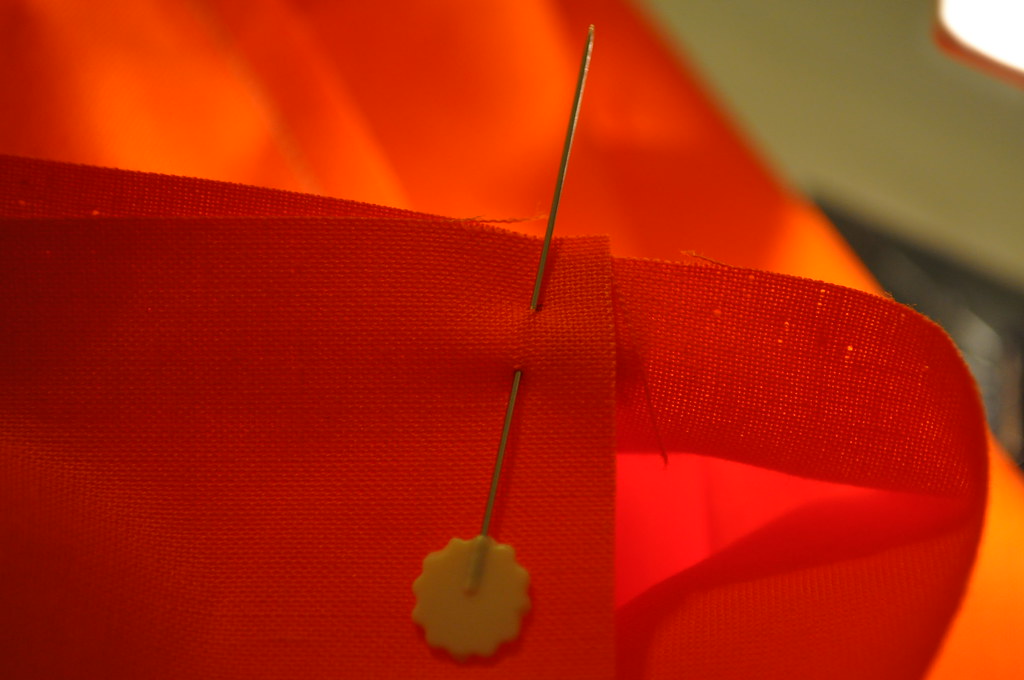
Stitch alongside your two short (8.5") sides first, leaving the 12.5" side open. Once both short sides are sitched, you will stitch the 12.5" side. When approaching your corners, fold the excess carefully to allow your stitching to get right up to that original dot:
When you've finished this stitching line, you're going to have a bag that looks an awful lot like the tote bag you already have. Congrats, you just made your lining!
To attach it to the bag, you need to first pin down your existing handles as shown:
Tuck the tote bag inside of your lining, with your lining flipped inside out - so that the outside of the bag, and the pretty side of the lining are facing each other. Stitch about 1/4" from the top edge, leaving a hole for turning.
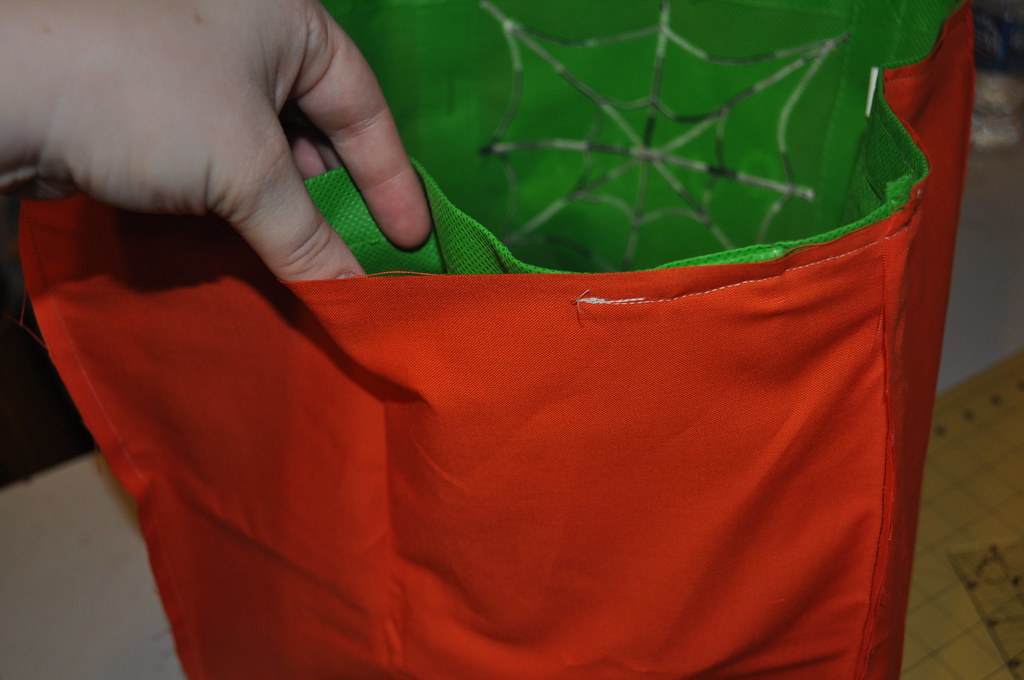
(See how the seams on the lining face outward?)
Carefully pull your tote bag out through that hole, turning it inside out. This is going to be a little bit tricky because of the hard plastic insert at the bottom. I found that if I rolled that insert up to push it through the hole, it went a bit smoother.
Now, you're looking at this - a bag with a big poof of fabric at the top!

Push your lining down into your bag - it should match up perfectly!
To close the hole you opened for turning, we'll do a complete topstitch around the top of the bag. I unpinned my handles at this point so that I could stitch with them in the upward position.
You have a few options here. You can either pinch your lining and bag together tightly so the lining doesn't show to the front, and topstitch with it like so:
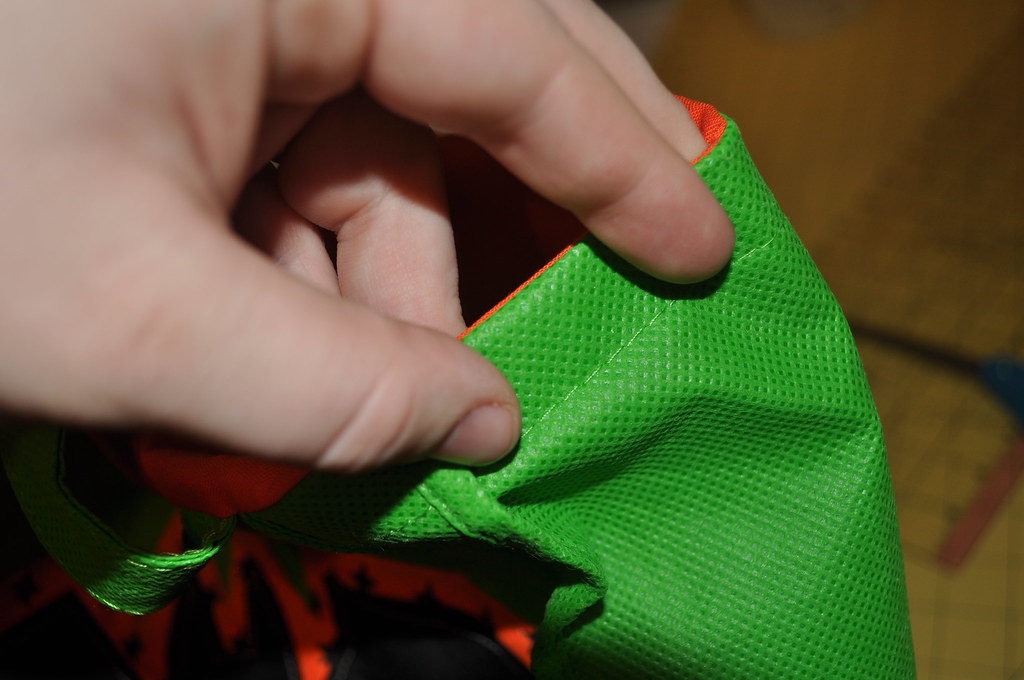
Or, because of the stiffness of the actual tote, you can allow it to roll naturally and topstitch with about a half inch of your orange lining showing, like I did:
Love it! A custom tote bag in under an hour!
Don't forget to upload your finished photos to the Flickr Group, and Link Up at Fabric Donkey for a chance to win the grand prize - a Riley Blake Doodlebug Designs Trick or Treat Fat Quarter Bundle!

7 comments:
Great idea - but living in the UK it will work out expensive to fly in and get me one of those bags! Heehee! Tempting though?! As I could fill it with lots of other fabric goodies....
Very clever!
Just about every store in Australia sells them - green is also the most popular colour, especially in the supermarkets! The local Big Box Craft Store has them in red.
I love this! Every time I see these bags I think there should be a way to 'cuten' them up!
Thanks for the great tutorial:) I get bored with my store- bought bags and now have endless possibilities!
OOHH Great idea! I have quite a few of those publics bags and my ods needs a bigger bucket this year...I think this may be just the ticket. Thanks for sharing!
Totally creative bag. Looks great!
It is a great idea....I just wish I could sew...LOL.
Post a Comment